+1 855 796 4355
First Canvas Power App: Learn Few Easy and Important Commands
These days there are so many companies that are developing software applications to help businesses manage the projects. But, nothing comes close to dynamics 365 project service automation. It is unique and is one software that every business should have if they want to manage projects and help them to become successful. Companies can track as well as manage projects well when they use this particular software.astering this software is essential if you want to use this application efficiently. PowerApps is one service that Microsoft offers, and developers can use it to build apps as per the requirement of the client.
As my thoughts build to initiate writing this blog, similar was the feeling when I first thought about exploring Power Apps. The expression was, “What exactly is Power Apps?”. When the world is talking about it, it brings me more curiosity to understand what is so powerful about it.
Let’s first commence with understanding what exactly is Power Apps:
- PowerApps is an initiative by Microsoft that allows developers and nontechnical users to build mobile applications from selectable templates.
- The objective of PowerApps is to enable business users to build new capabilities via apps, without requiring that they have code expertise.
Types of Power Apps:
- Model driven apps: These types of apps directly publish the entity on the mobile/ tablet. These apps can be used from Microsoft Dynamics 365 App from mobile. They are very easy to make and can be ready within 15mins of time.
- Canvas apps: These apps are blank canvas given to the developers with a free hand to design the app in the way they want.
In this blog we shall focus more on how to make a Canvas app. Follow the steps below to make a PowerApps.
Step 1:
Login to www.portal.office.com
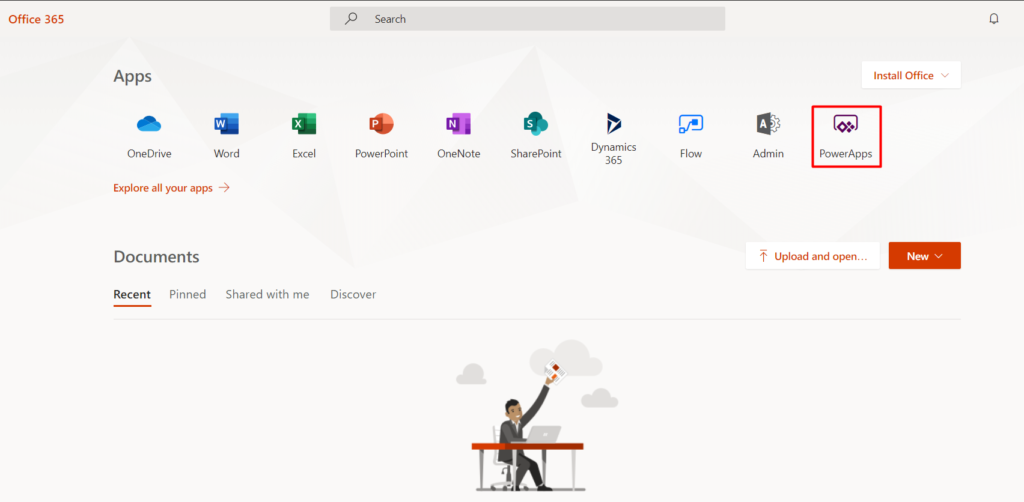
Step 2:
Click on PowerApps icon as shown in the image below:
This will open a new browser tab where we need to select what kind of app do we need to make.

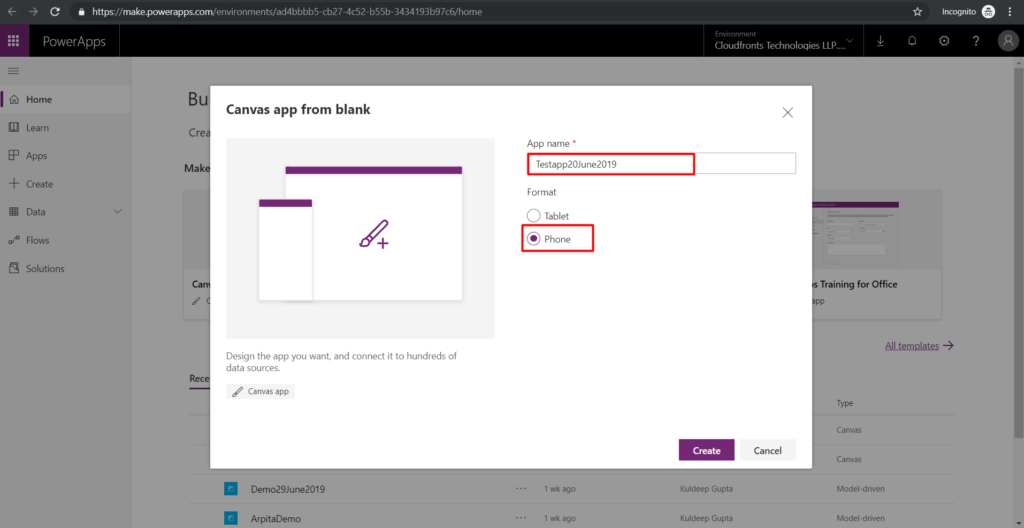
Step 3:
Click on Canvas app from blank, which opens a pop up. Please name your app and select whether the app is for Phone or for Tablet as shown below and click on Create button.
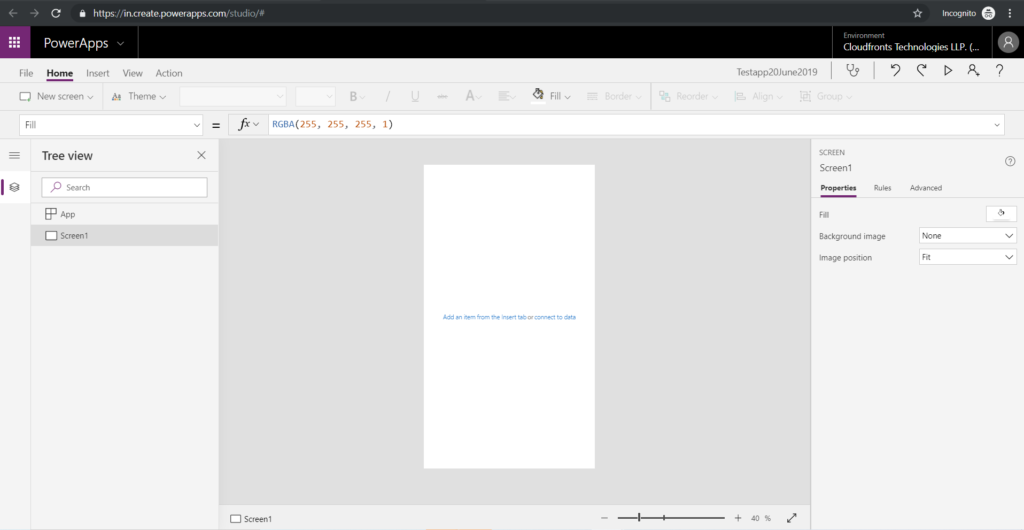
This opens the Canvas app editor as shown below:
To take this blog forward, I will use an app that is created by me and explain a few commands used by me and how was the design done in that app.
The app captures the Grievances of people in office.
There are 5 screens created by me and they are:
- list_Grievances Screen: This list all the grievances in the system.
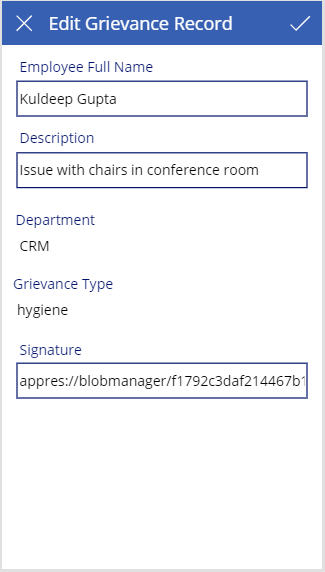
2. frm_GrievanceRecord Screen: This opens a grievance record.
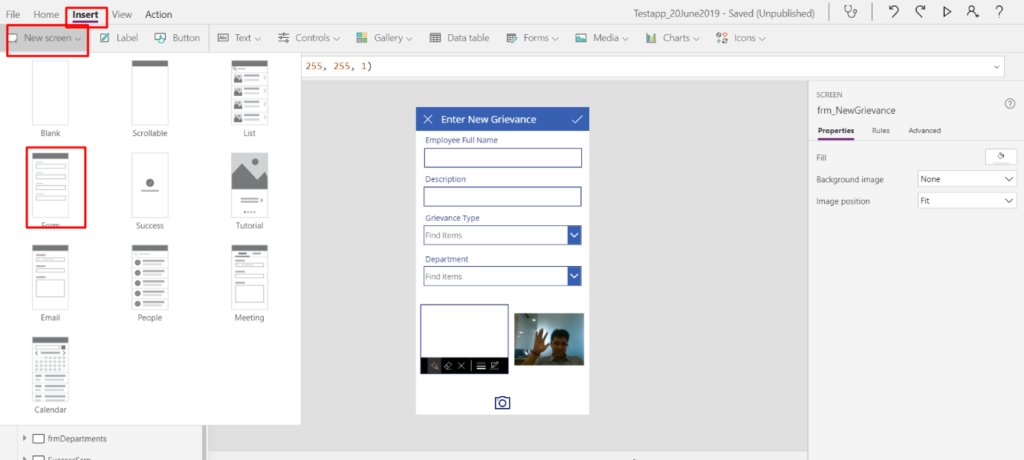
3. Frm_NewGrievance Screen: This screen is used to capture a new grievance.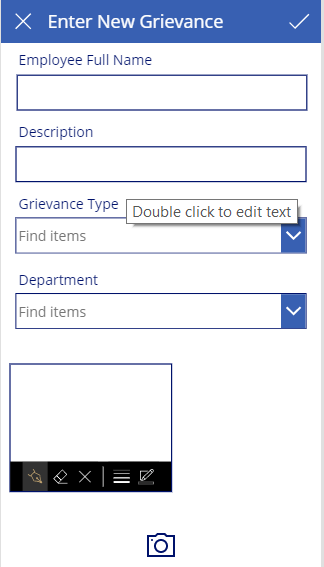
4. Frm_CameraScreen : This is used to capture the image of the grievance using camera control.

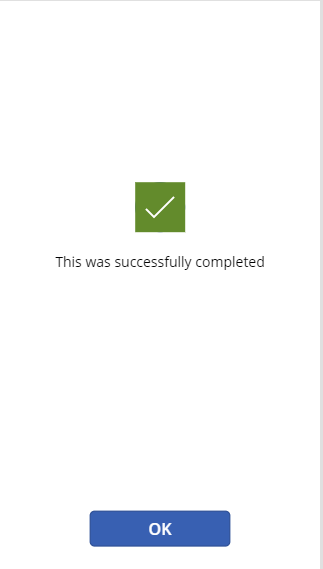
5. SuccessScrn: This is used to display the success on the screen.
Technical dive
Let’s take a dive in each screen and get into understanding of functionalities developed on each screen:
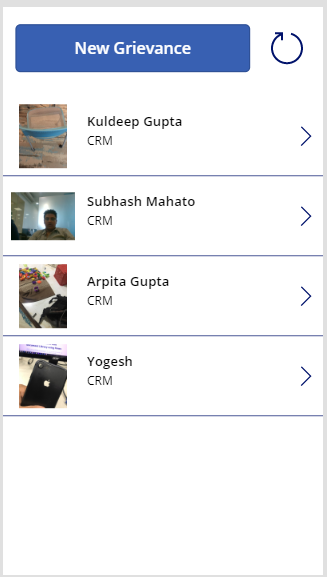
- List_grievances:
- a. New Grievance button: This button will navigate to a frm_NewGrievance Record to capture new grievance from the employee. The code written behind that is:………………………………………………………………………………………………………………Navigate(frm_NewGrievance,
ScreenTransition.Fade
);
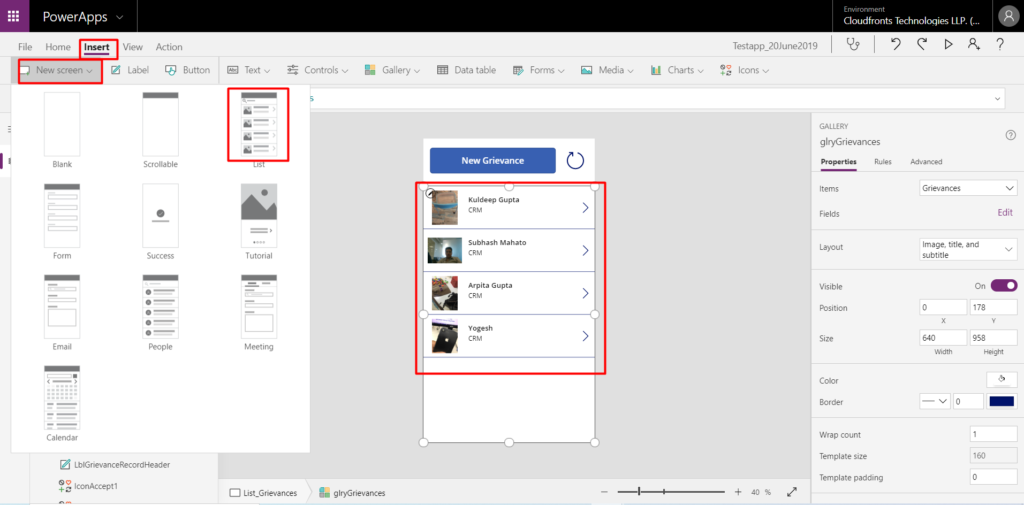
…………………………………………………………………………………………………………………….b. To display the list of Grievance I have inserted a List Screen as shown in the image below:
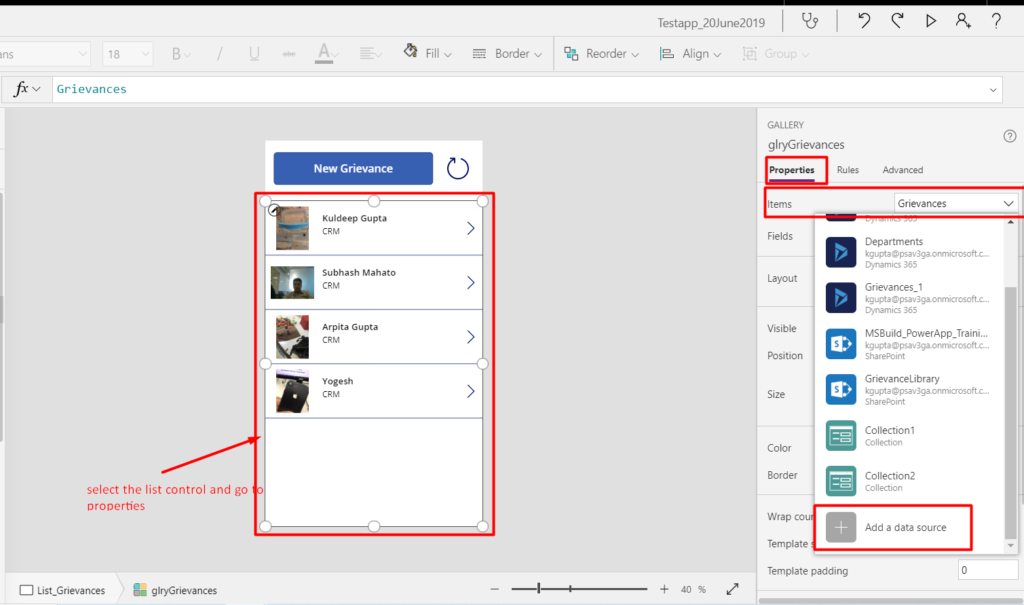
c. To display the list of Grievance, we need to add a Data Source. How to add a data source is shown below:
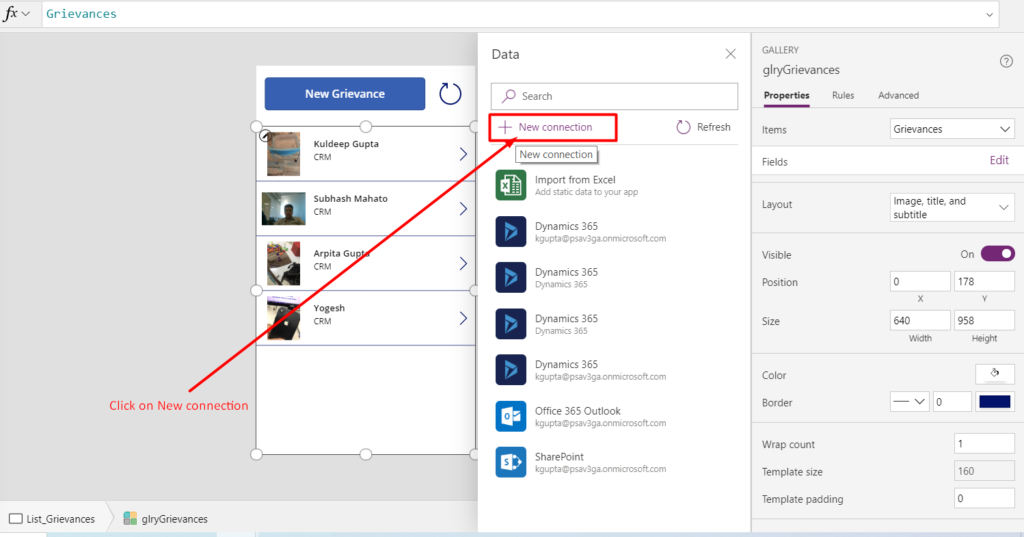
There are approximately more than 250 Data sources to which Power apps can connect. Select the data source you wish to connect. In my case, I will connect to Dynamics 365 Data Source.

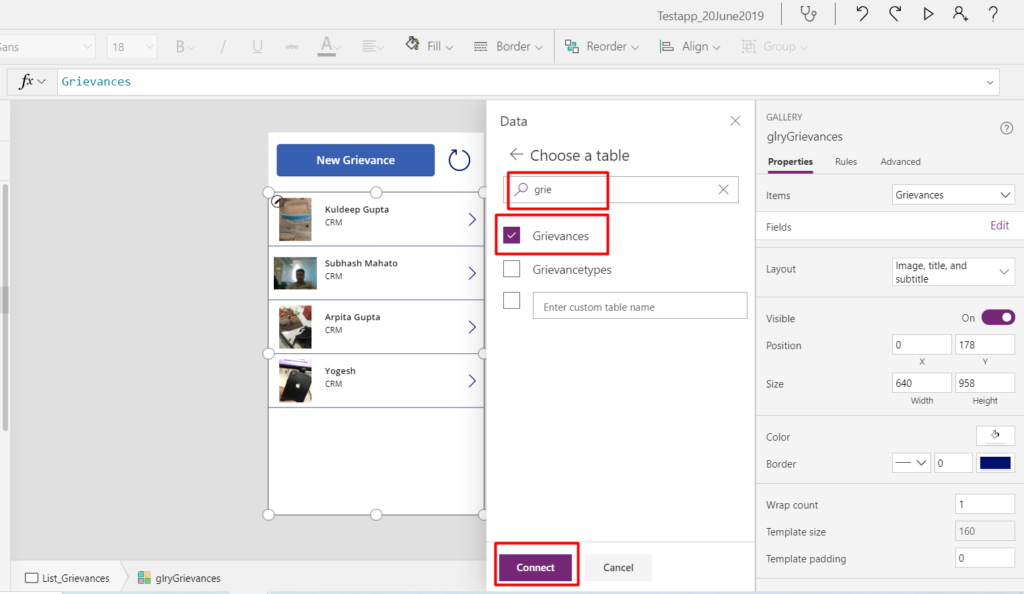
It will ask you to choose your entity and then you can click on connect.
Your Data Source “Grievances” will start appearing in Items drop down of Property Window.
Post that we can align the attributes that we need to see on the list view:
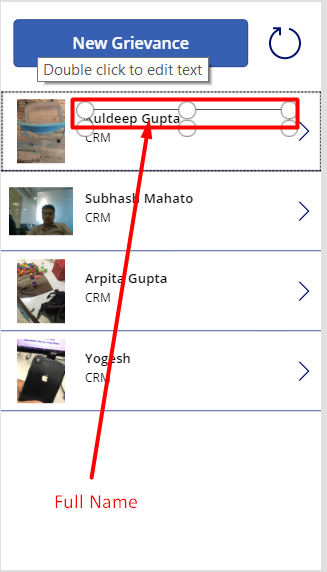
To Display Employee Full Name, below is the code that I wrote:
…………………………………………………………………..
ThisItem.’Employee Full Name’
…………………………………………………………………
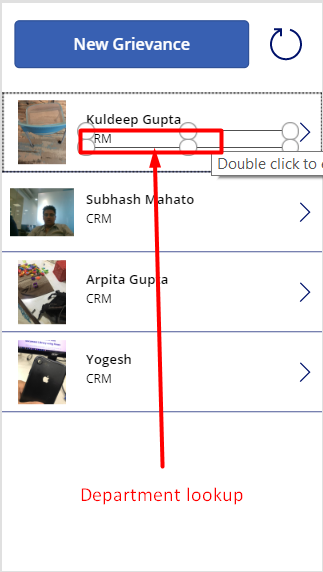
To get the department value, which is a lookup to another entity below is the code that was written:
………………………………………………………………….
LookUp(Departments,new_departmentid=ThisItem.Department, new_name)
………………………………………………………………….
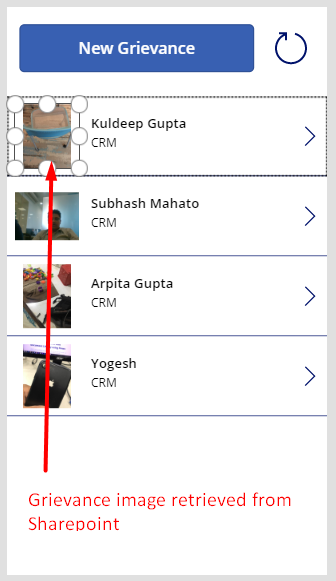
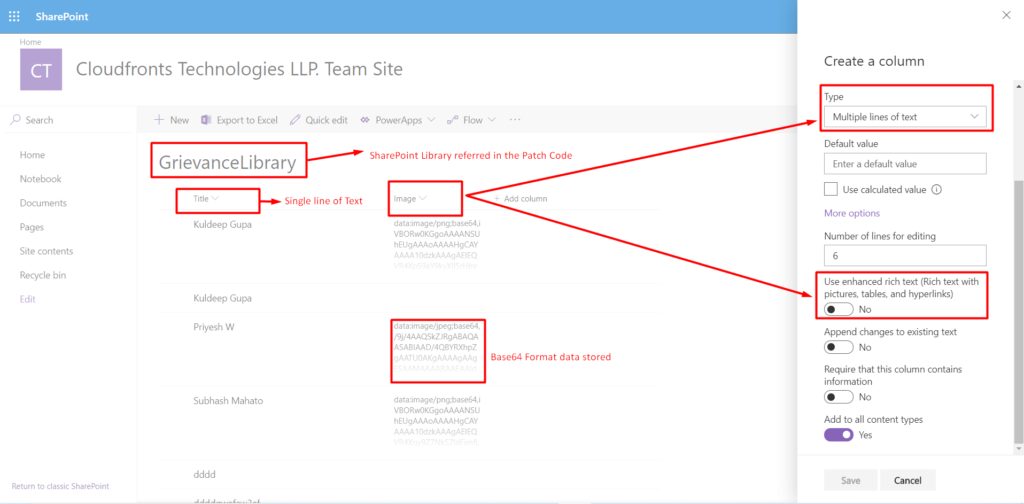
To display the image from the SharePoint Library, below is the code:
LookUp(GrievanceLibrary, Title = TitleGrievance.Text, Image)
Where GrievanceLibrary is the Sharepoint Datasource added in Powerapp and Title and image are the fields created in SharePoint.
To open the Grievance record on frm_Grievance Record, write the below code:
Navigate(frm_GrievanceRecord,ScreenTransition.Fade,glryGrievances.Selected)
- frm_NewGrievanceRecord:
To store the new grievance record, we used the Form Screen.
On the update button, write the below code:
Patch(
Grievances,
Defaults(Grievances),
{
new_employeefullname: DataCardValue3.Text,
new_description: DataCardValue15.Text,
_new_departmentl_value: DataCardValue10.Selected.new_departmentid,
_new_grievancetypel_value: DataCardValue6.Selected.new_grievancetypeid,
new_signature: PenInput4.Image
}
);
Patch(
GrievanceLibrary,
Defaults(GrievanceLibrary),
{
Title: DataCardValue3.Text,
Image: First(Collection1).Url
}
);
UpdateContext({resettext: !resettext});
UpdateContext({resetcombobox: !resetcombobox});
Navigate(SuccessScrn,ScreenTransition.Fade);
- frm_CameraScreen
Insert a Camera Media Control on the form as shown in the below screen shot.
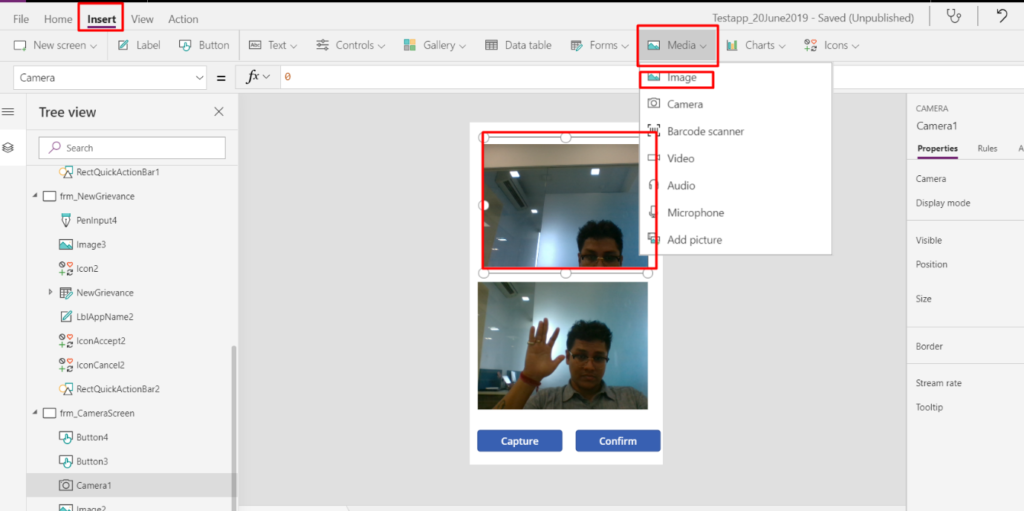
Insert an image control on the form below the Camera Media control.
Capture button code:
ClearCollect(Collection1, Camera1.Photo)
Collection 1 s described above is the SharePoint collection object which needs to be cleared and then referred with the new Photo from the Camera Control, which in our case is Camera1.
Confirm button code:
Confirm Button will only Navigate it to New Grievance form and the code is ass per below:
Navigate(frm_NewGrievance)
To summarise:
- We learned how to create a Canvas Power app.
- Different controls that can be used.
- How to store image on Sharepoint in a Power app.
- Again I am sharing the code for storing the image on Sharepoint herewith:
Patch(
GrievanceLibrary,
Defaults(GrievanceLibrary),
{
Title: DataCardValue3.Text,
Image: First(Collection1).Url
}
);
- To explain the above code, GrievanceLibrary is the SharePoint site of which Data Source is added.
- Title: This is a field in the Sharepoint library that will store the name of the Grievance. The data type in Sharepoint for Title is Single line Text
- Image: This will store the image in Sharepoint library in Base64 format. The data type of this field will be Multi lines of Text , but, we need to ensure that the rich text format is set to No. Please refer to the below screen shot.