+1 855 796 4355
Set up Gmail Authentication for D365 Portals
Introduction:
This blog explains How to set up Gmail Authentication for D365 Portals.
Steps:
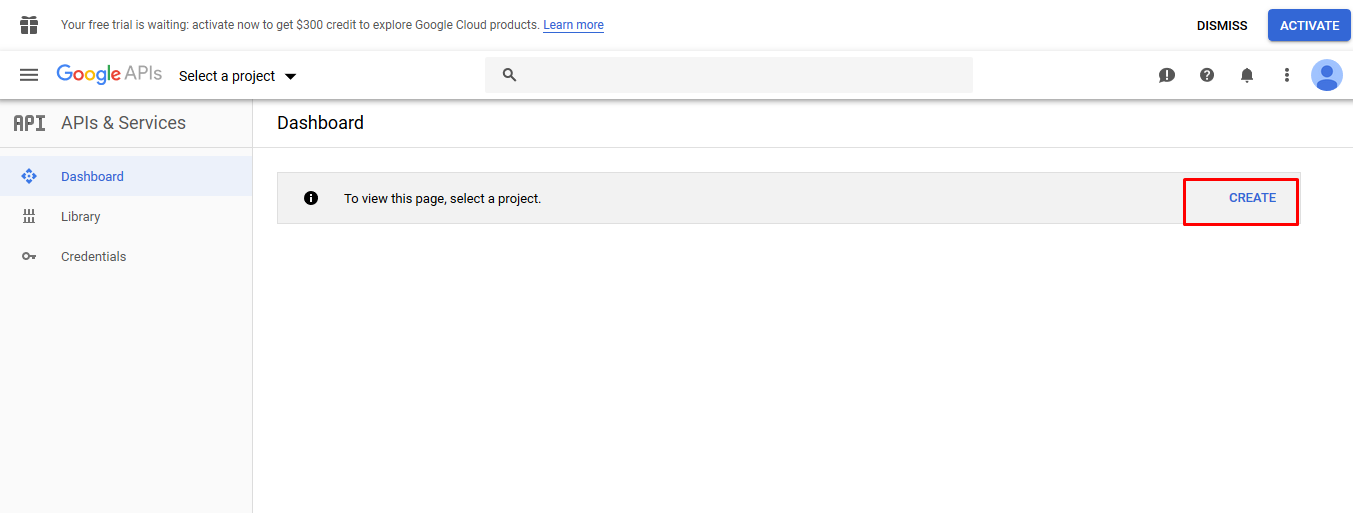
1.) Register D365 Portal with Google API
Go to Google API Console: https://console.developers.google.com/apis/dashboard?project=symmetric-axle-236007
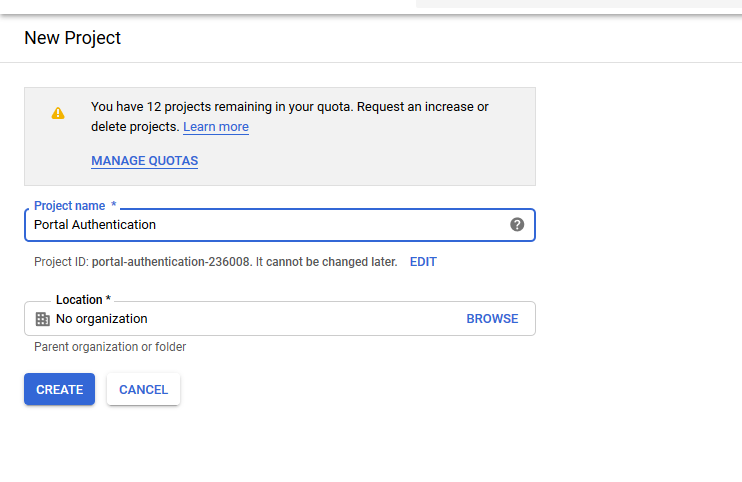
2.) Create New Project or select the Project.
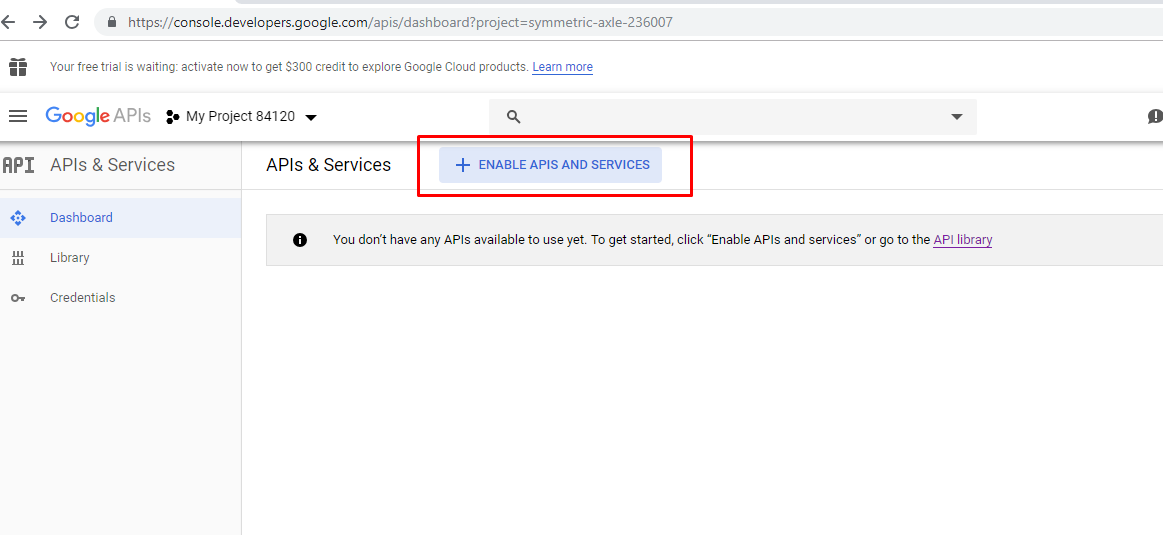
 3.) Click on “+Enable APIS and Services”
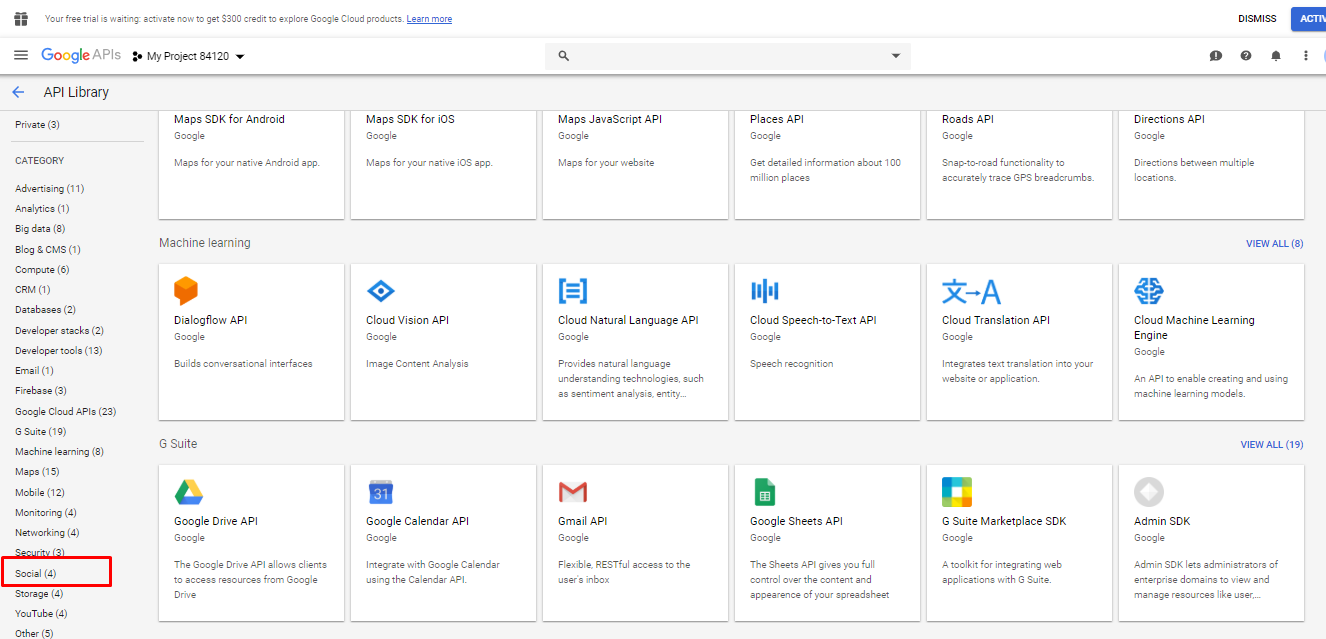
 4.) Select “Social” under category.
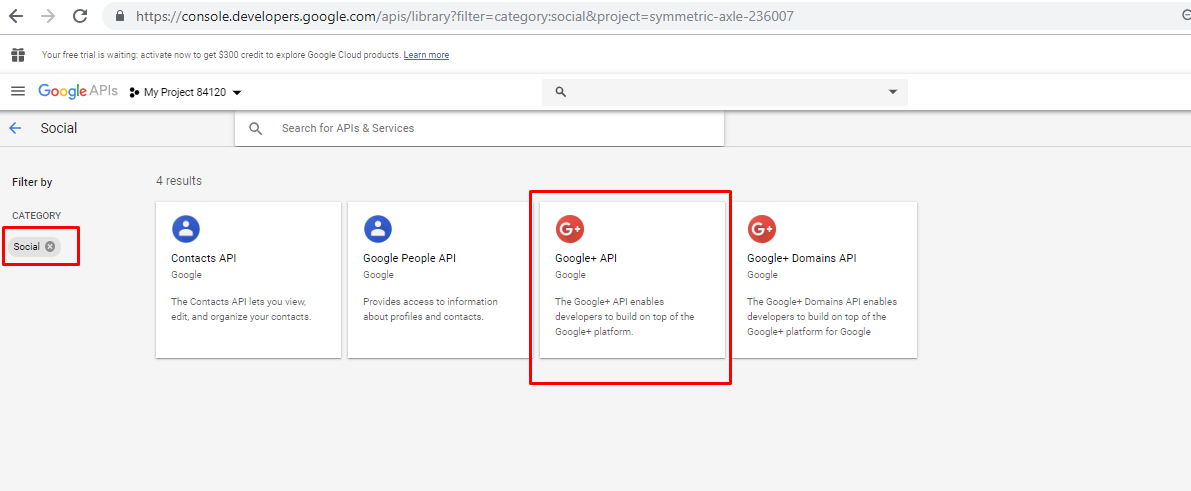
5.) Select “Google+API”
6.) Click on Enable.

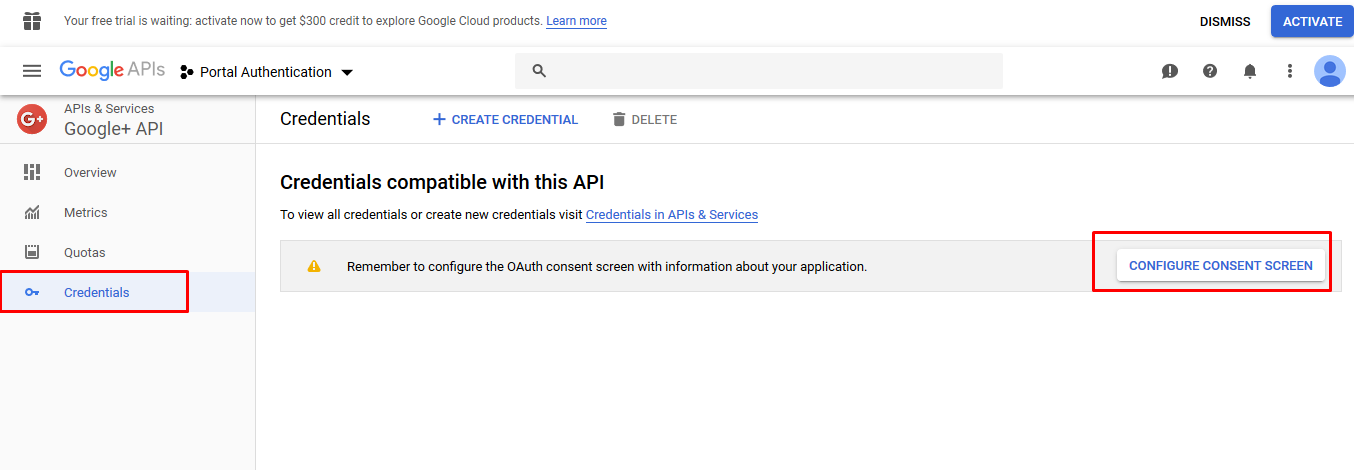
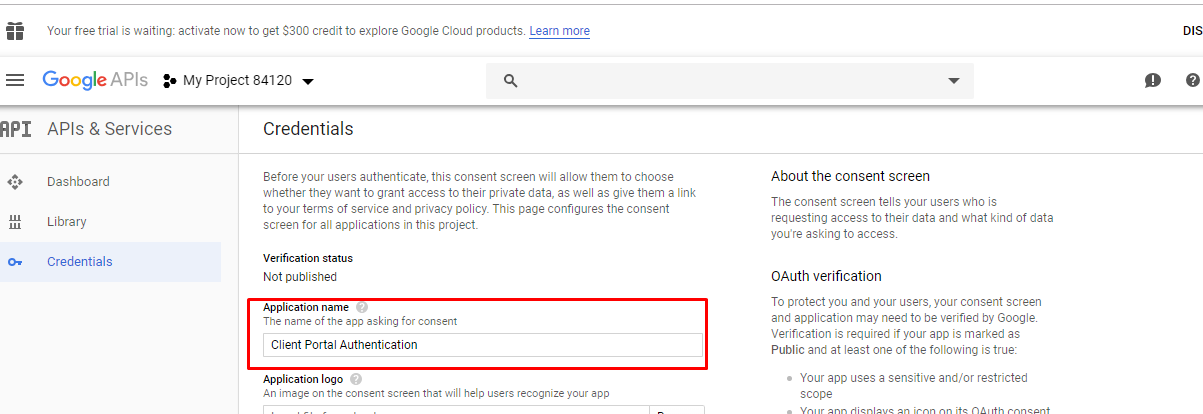
7.) Configure consent screen.
– Enter Application Name.
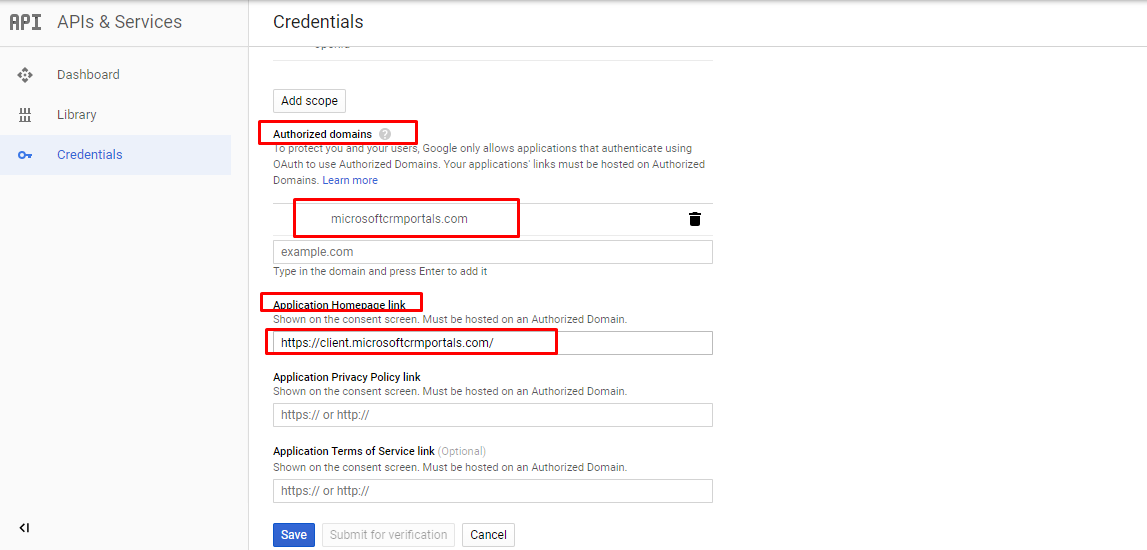
– Enter Authorized domains: “microsoftcrmportals.com”
– Enter Application Homepage link: “URL of D365 Portal”
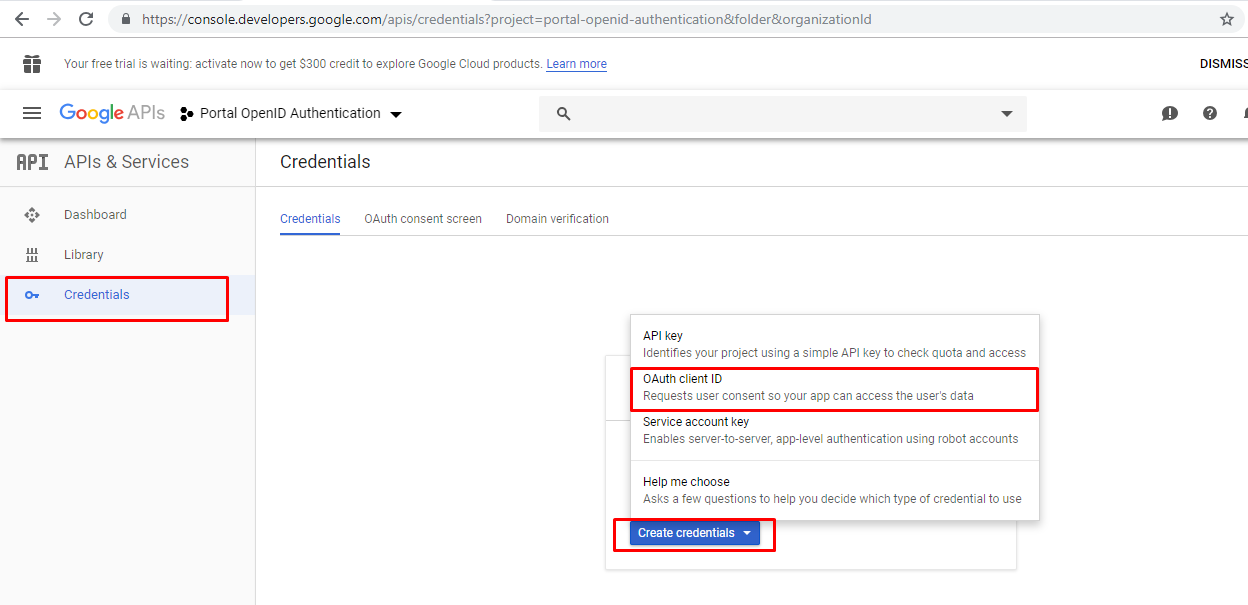
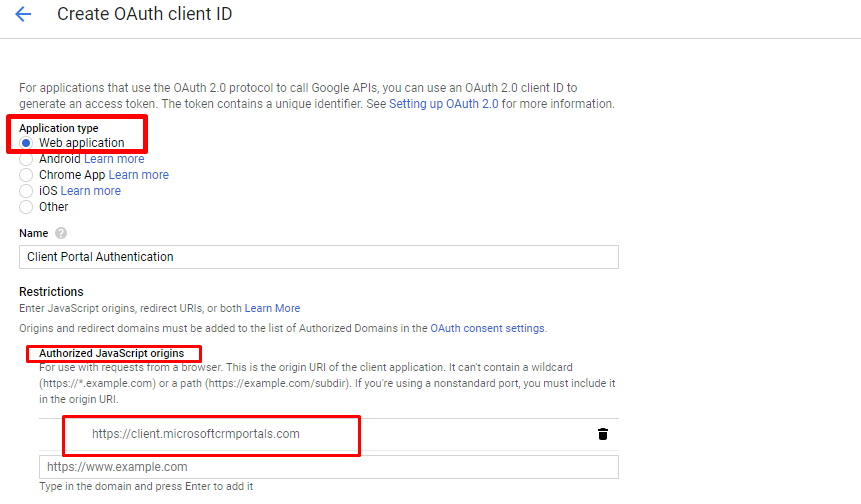
8.) Click on credentials ? Create Credentials and select OAuth Client ID.
 9.) Enter the below details.
– Select the Application type as “Web Application”
– Enter Name.
– Authorized JavaScript origins: “Enter Portal URL”
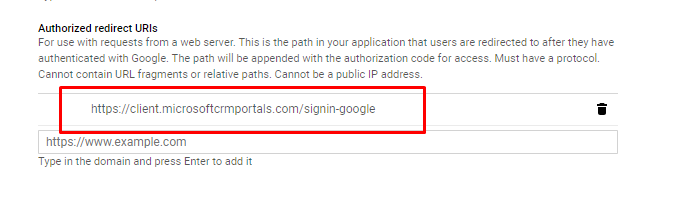
– Authorized redirect URIs: “PortalURL/signin-google”
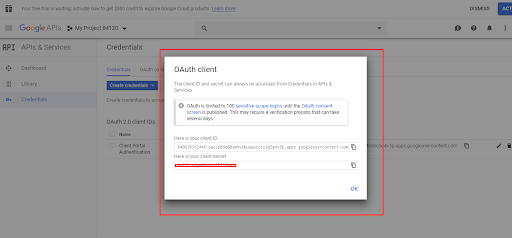
– Click on Create.
– Popup window will come copy the “client ID” and “client secret” values from that.
Step 2: Creating Site Settings in CRM.
1. Go to Portals ? Site Settings.
2. Create new records as per below.
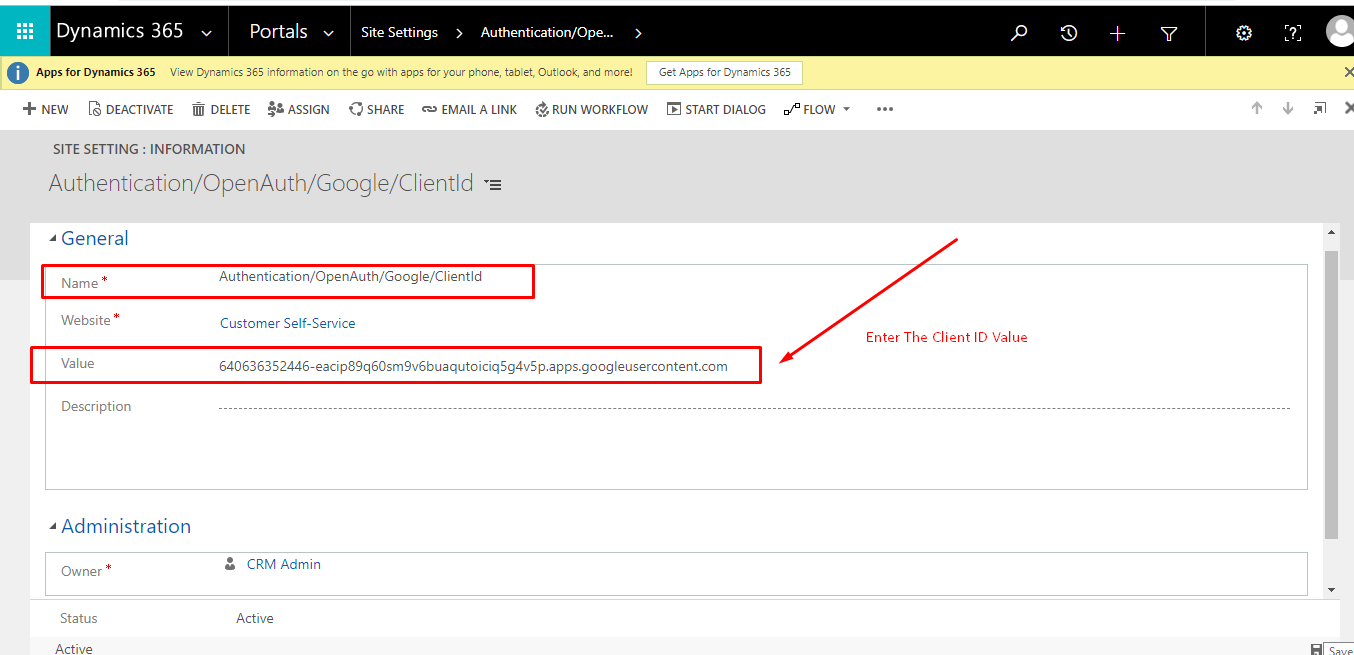
Name: Authentication/OpenAuth/Google/ClientId
Value: Copy and Paste the Client ID value.
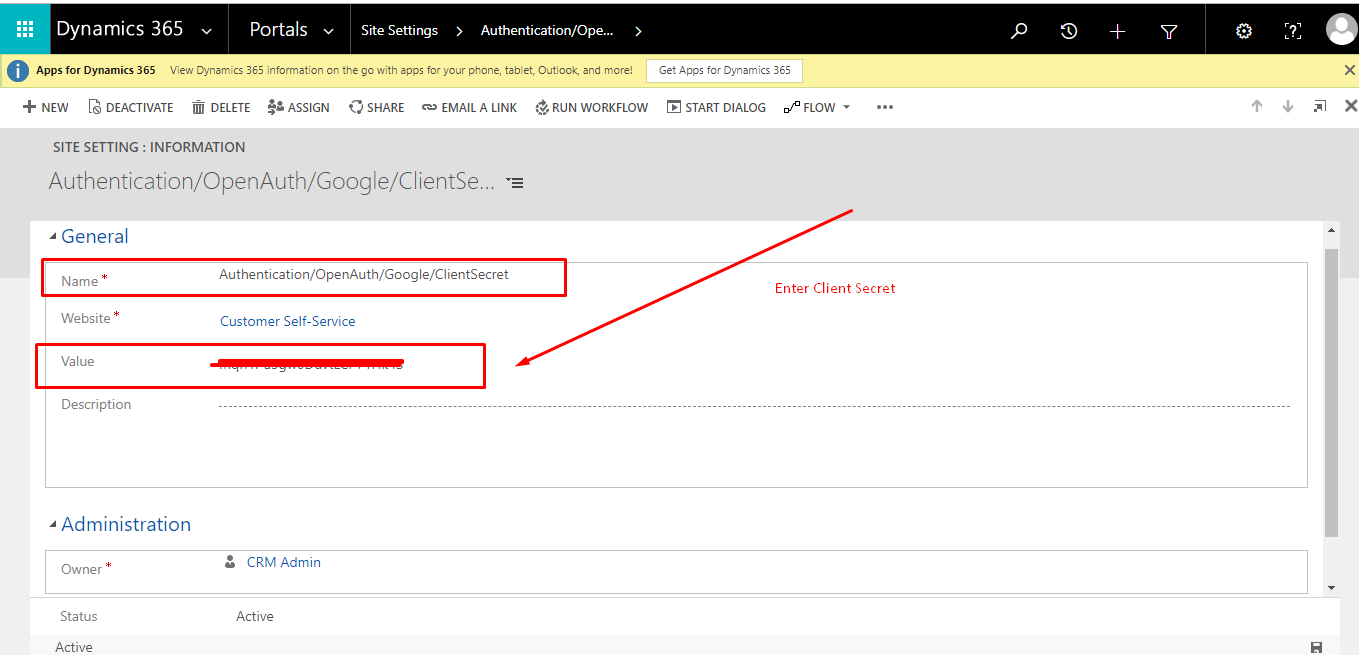
Name: Authentication/OpenAuth/Google/ClientSecret
Value: Copy and Paste the Client Secret value.
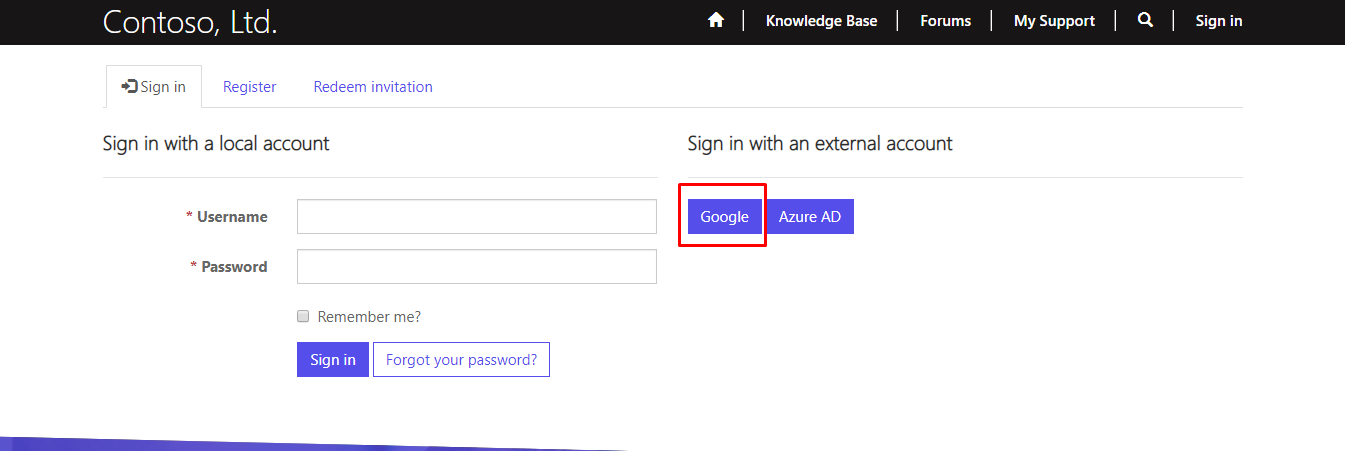
Now you can see “Google” as sign in Option.