 +1 855 796 4355
OCR service Setup and process in Microsoft Dynamics 365 Business Central
Introduction to OCR:
- OCR (Optical Character Recognition) is used to automate the data entry process for vendor invoices
- When a purchase invoice is received from the vendor, the client stores the invoice either in a file or manually does the entries in excel sheet
- With the use of Microsoft Dynamics 365 Business Central, invoices can be stored on cloud in the system
OCR service setup:
- OCR service setup needs to be done in order to process the automation which is done through Kofax, which is a process automation software provider.
- The client should register to avail the following functions at the given price:
| Trial | Basic | Premium | |
| Documents | 75 | 100 | 100 |
| Validity(months) | 2 | 1 | 1 |
| Price (USD) | Free | $60 | $105 |
| Price per extra Invoice | No extra invoice after 75 | $0.56 | $1.12 |
| Specifications: | Yes | Yes | Yes |
| · Online correction | |||
| · Header/Footer capture | Yes | Yes | Yes |
| · Line item capture | Yes | No | Yes |
- To avail this service the user needs to get registered under Kofax. (www.kofax.com)
- Registration process includes providing details such as: name, email, mobile no, Company name, address and so on.
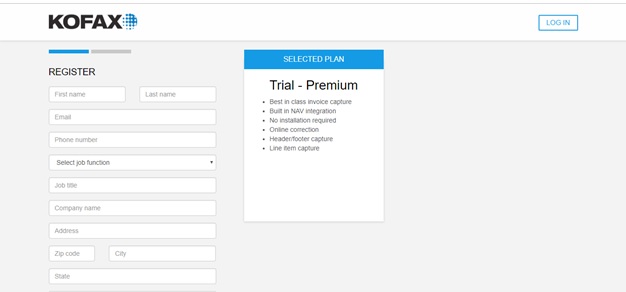
Fig 1. Kofax sign up page
- Once the registration is complete Kofax sends an authorization key to the user on his mentioned email.
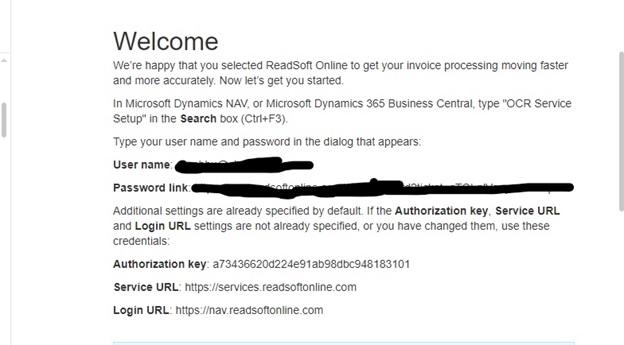
Fig 2. Registration mail from Kofax
- The key is later used to send the invoices to the service provider to scan the invoice and receive it back. (without the authorization key, OCR process cannot be completed)
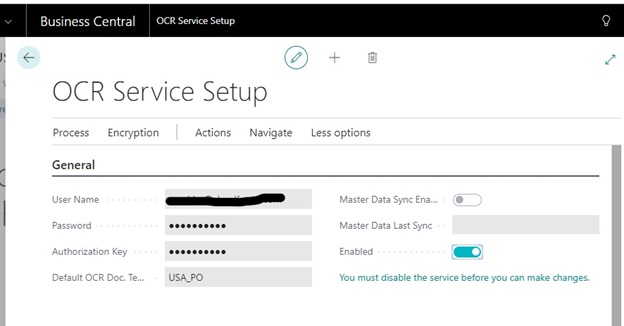
Fig 3. OCR service setup
OCR process:
- For mail received invoice save the pdf invoice in the computer and for printed copy of invoice click a picture of the invoice which should be a clear and visible picture.
- Go to incoming documents in Microsoft Dynamics 365 Business Central.
- Click My incoming documents
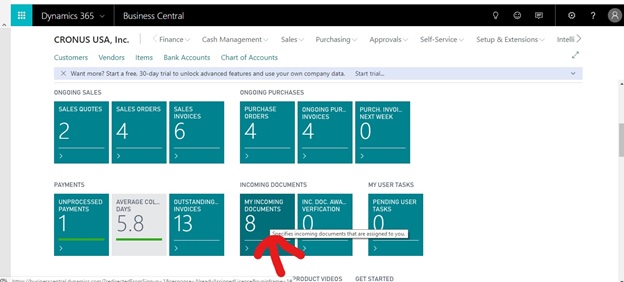
Fig 4.
- Click on new and then create from file
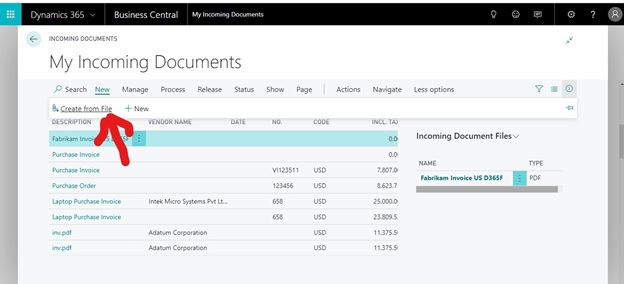
Fig 5. Creating Invoice from File
- This will ask to choose a file from your computer
- Choose the file pdf saved earlier in the computer
- Check all the details of the vendor invoice
- Click on OCR and then send to OCR service
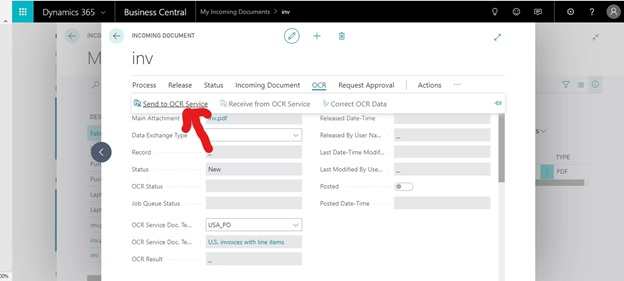
Fig 6. Sending the document to OCR service
- Click on receive from OCR service
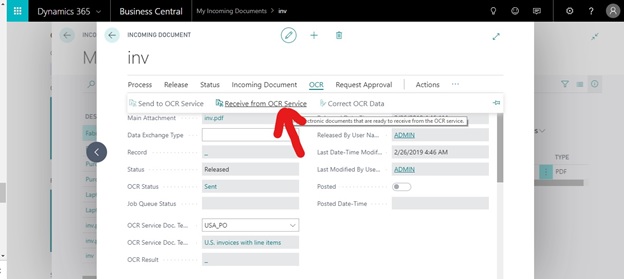
Fig 7. Receiving the document from OCR service
- The details on the invoice will be entered as per the heads in the document
- Check all the financial details as per the invoice to verify
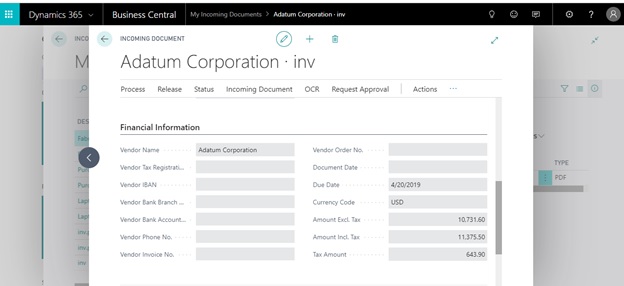
Fig 8. Checking the financial information
- Click create document and the document will get stored in the system
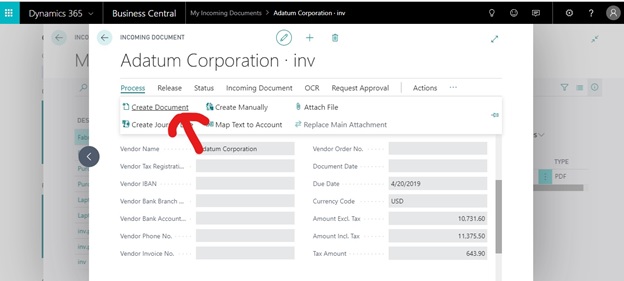
Fig 9. Creating the document as purchase invoice
- Check for errors and warnings in the document
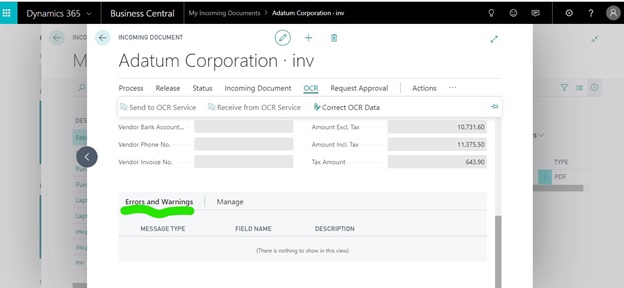
Fig 10. Checking for errors and warnings
- To correct the error, click on OCR and under that correct the OCR
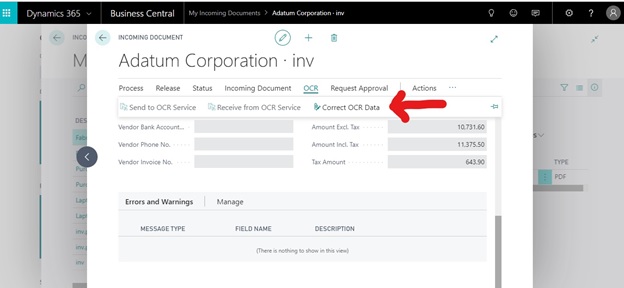
Fig 11. Option to correct the OCR
- Correct the mistakes and select “Send OCR Feedback” to send the corrections to the OCR service, so that the mistakes will not repeat
- You can check the document in the purchase invoice
- Open the created document
- Enter the vendor invoice number for reference which will be star marked
- Now post the document with an option to print the document as well
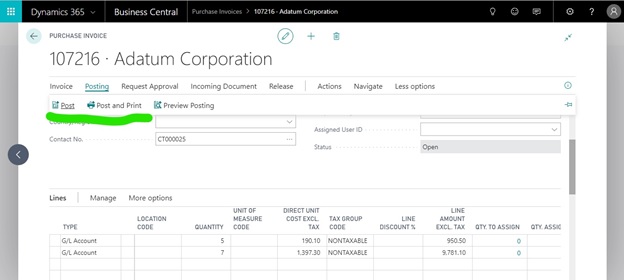
Fig 12. Final posting of the purchase invoice
- Check for the document in the posted purchase invoice by searching for the vendor invoice number.