+1 855 796 4355
Import a .csv file for Bank Reconciliation in Dynamics NAV 2017
Introduction:
This article gives a step by step process to import a .csv file in Dynamics NAV 2017 for Bank Reconciliation.
Pre-requisites:
- Microsoft Dynamics NAV 2017
- Microsoft Excel
Steps:
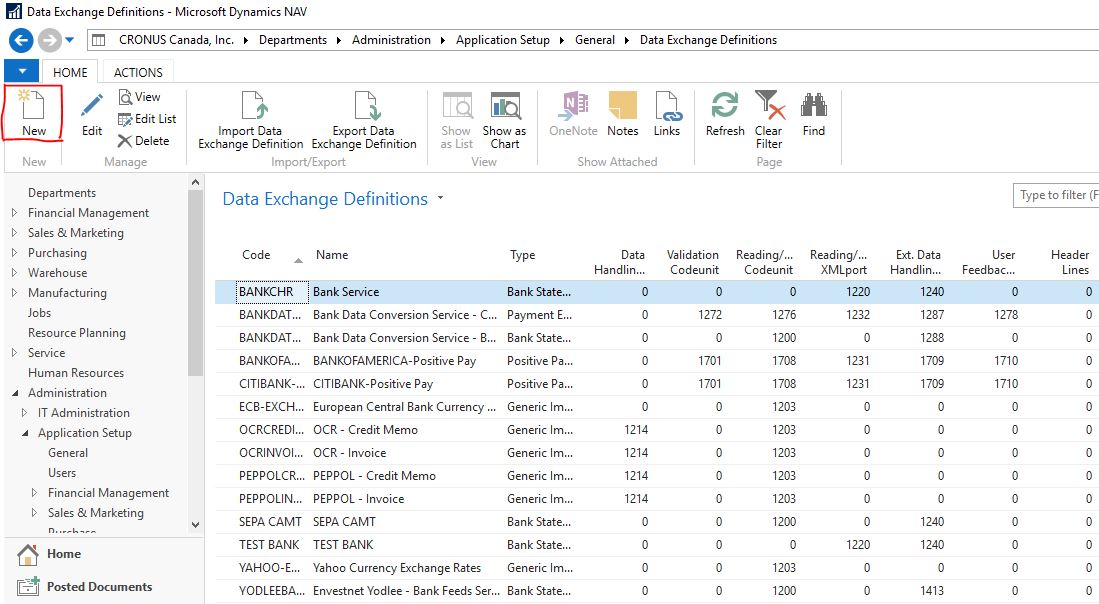
1. Browse to Data Exchange Definition page, and click on new to create a new data exchange setup. This setup enables us to import a specified bank statements file.
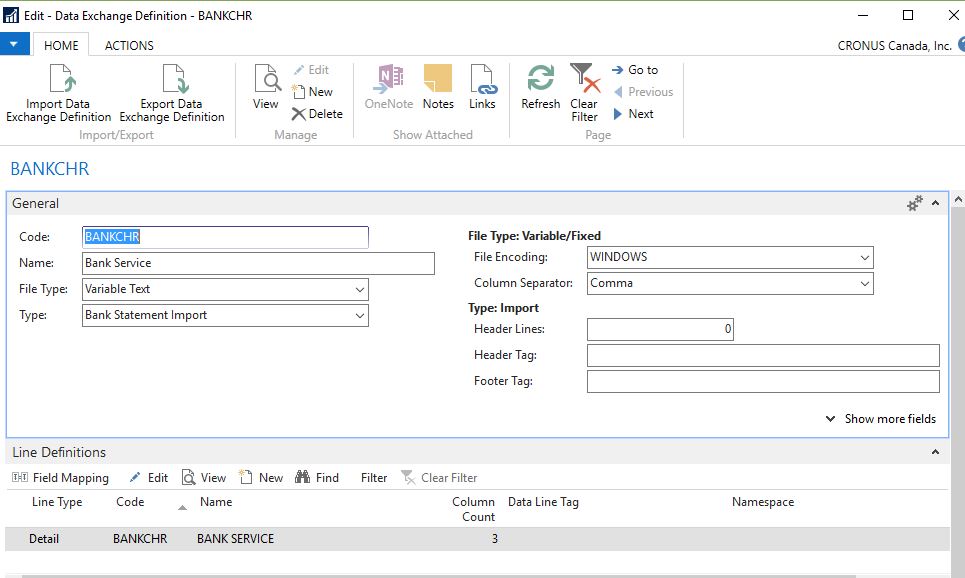
2. In the new ‘Data Exchange Definition’ enter the code and name.
- File type – Variable Text
- Type – Bank Statement Import
- Reading/Writing Xml Port – 1220
- Ext Data Handling Codeunit – 1240
- And in the Line definition enter the code, name and the column count
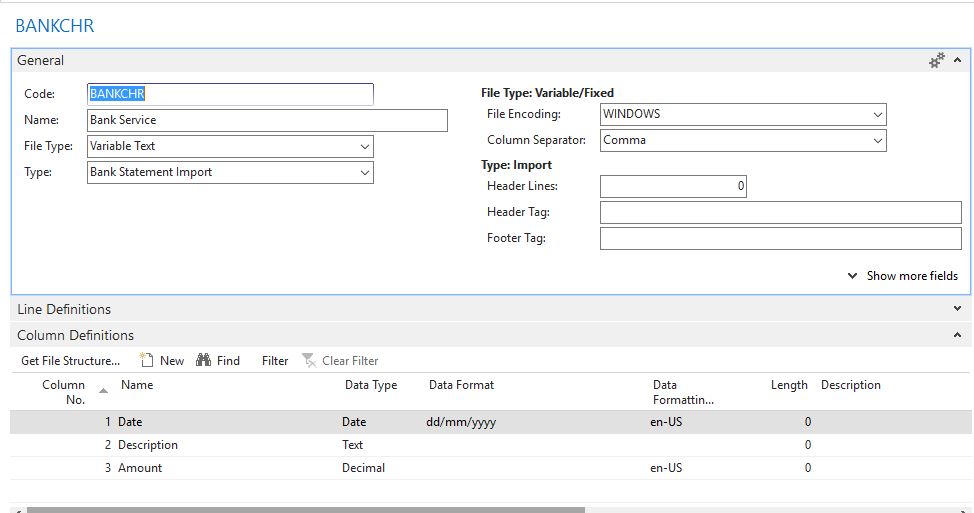
3. Enter the column definition and associate appropriate data types. The columns are from the bank statement file which we need to map to Microsoft dynamics NAV. Go to Column definitions for Data Exchange Definition, and make sure Data Format has an uppercase M.
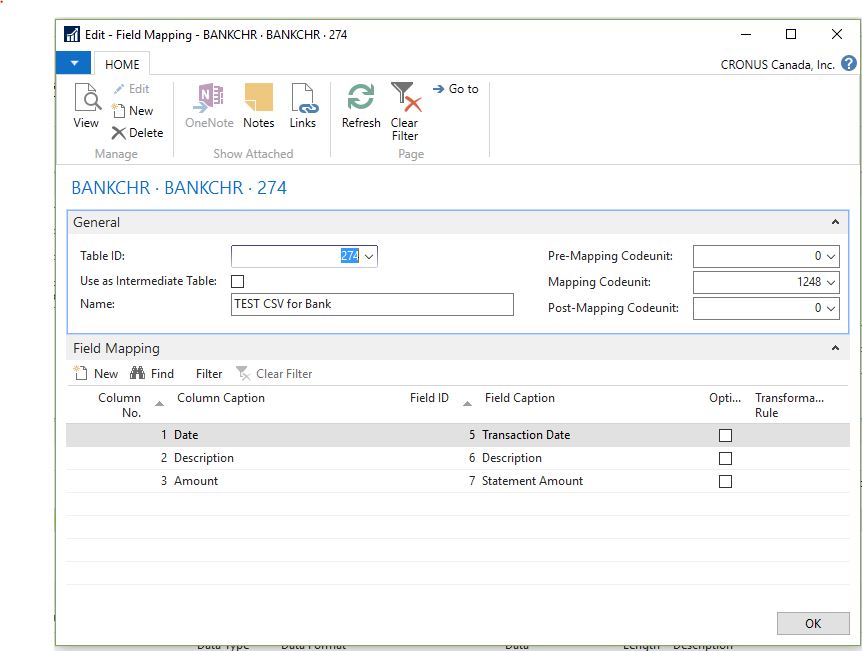
4. Now click on the ‘Field Mapping’ button in the Line definition tab.

5. The Data exchange Mapping window opens, click on new and enter the details
- Table Id: 274
- Mapping codeunit:1248
- And give a Name to the Mapping.
In the Field Mapping tab, select the column number and map it with the appropriate field Id.
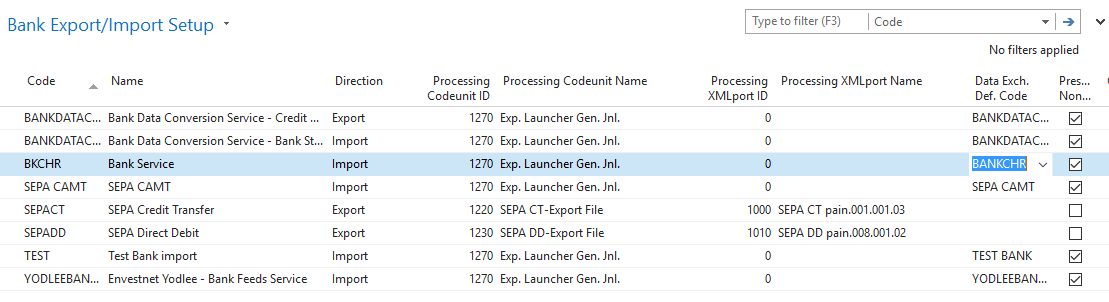
6. Now in the search bar of the NAV Windows client, browse to Bank Export-Import setup and click on new and enter the details, fill the entries for code, name
- Direction – Import
- Processing Codeunit Id – 1270
- In the Data Exchange Definition code, select the drop down to the Data exchange definition created and click on OK.
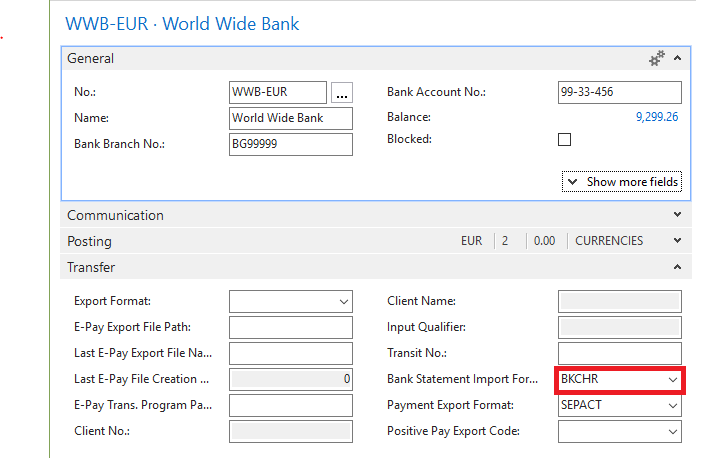
7. Browse to ‘Bank account’ from the NAV Windows Client and select the bank where you want to import the bank statement. Click on Edit. In the Bank Statement Import format of the Transfer tab, select the bank import set up created.
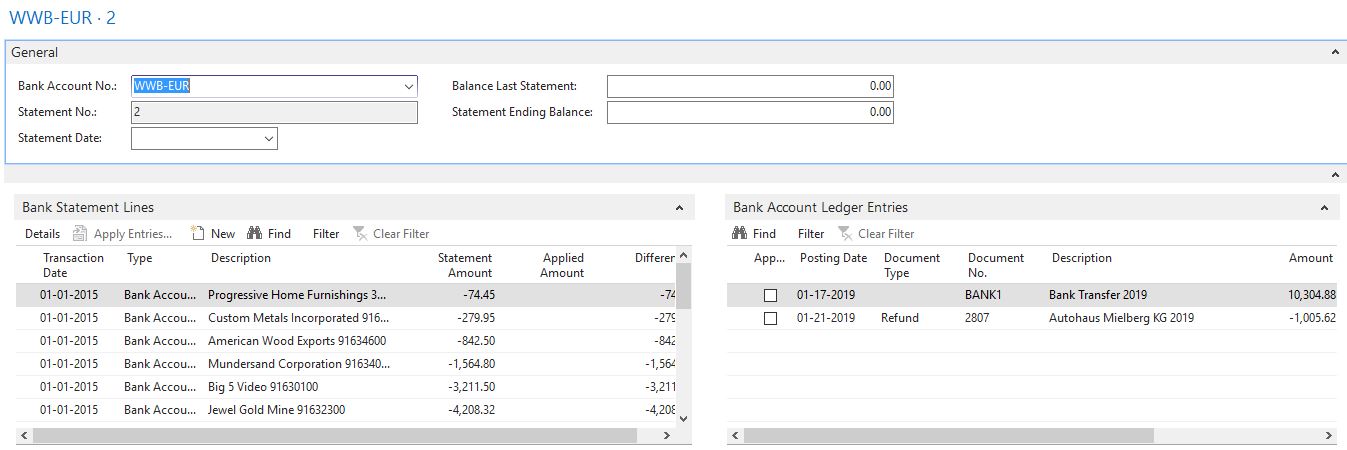
8. Browse to the Bank account Reconciliation page and click on new, select the bank account where the Bank statement Import Format is assigned.
9. Click on the Import Bank Statement button under the Home tab.
10. Select the CSV file of the bank statement.
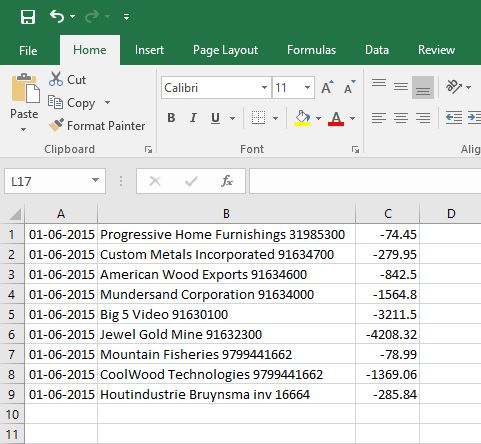
11. The Bank statement will be imported and you can view the changes in the Bank statement Lines tab.