+1 855 796 4355
Explore Business Central API through Postman using AAD Authentication
Introduction:
In this article, we will walk through steps on how to authenticate Business Central API using AAD Authentication in Postman
Pre-Requisite:
- Business Central account
- Admin Access in Azure Portal
Business Central API AAD authentication in Postman:
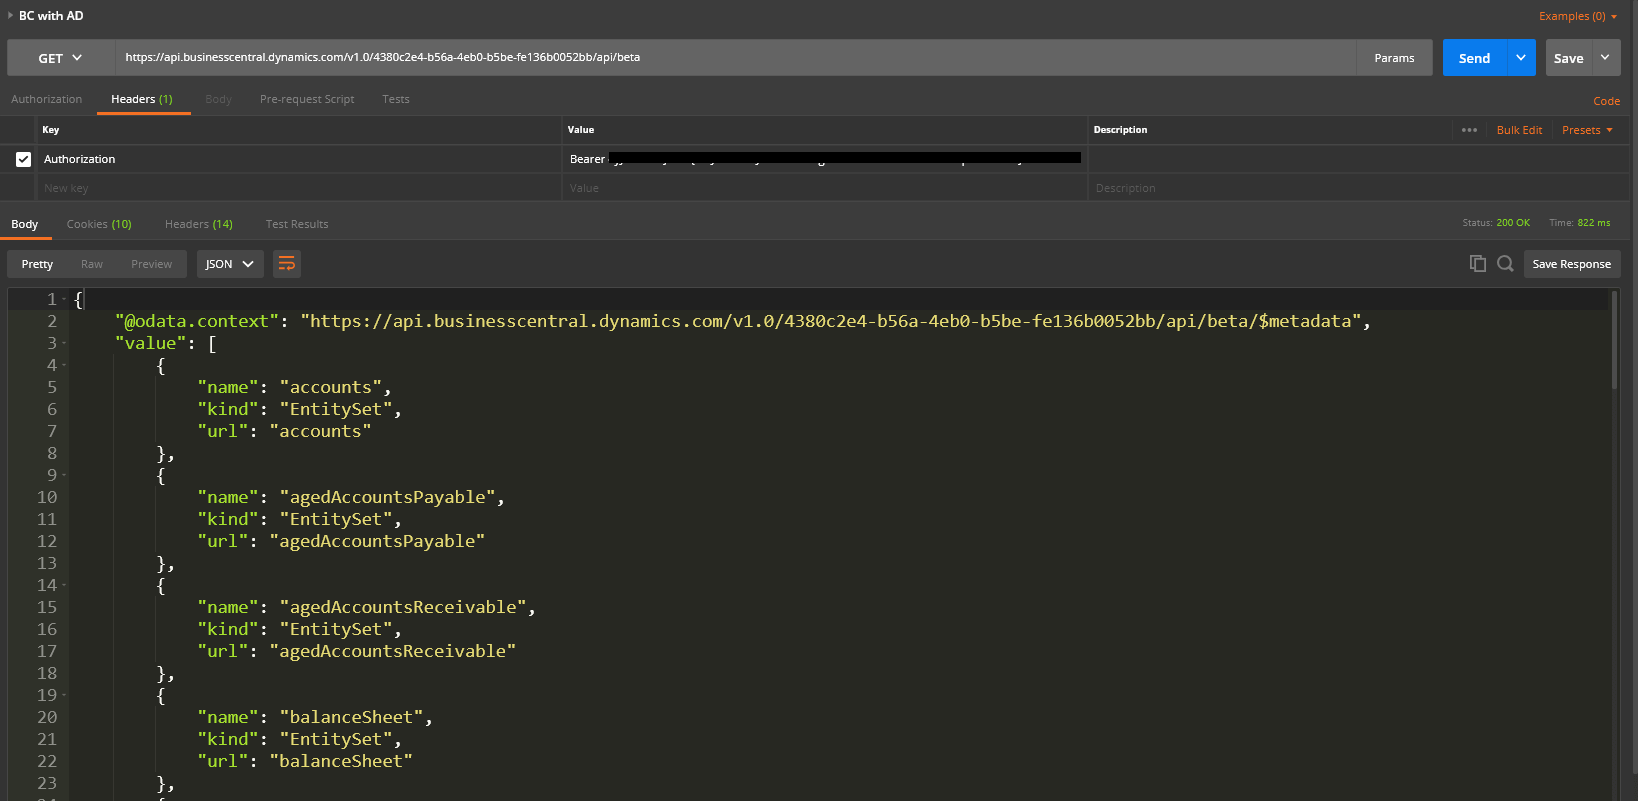
- In Postman, make a GET request to Business Central base API URL.
Base URL: https://api.businesscentral.dynamics.com/v1.0/api/beta
For using successful authentication, we need to add domain name or tenant ID
Domain URL: https://api.businesscentral.dynamics.com/v1.0/myusersdomain.com/api/beta
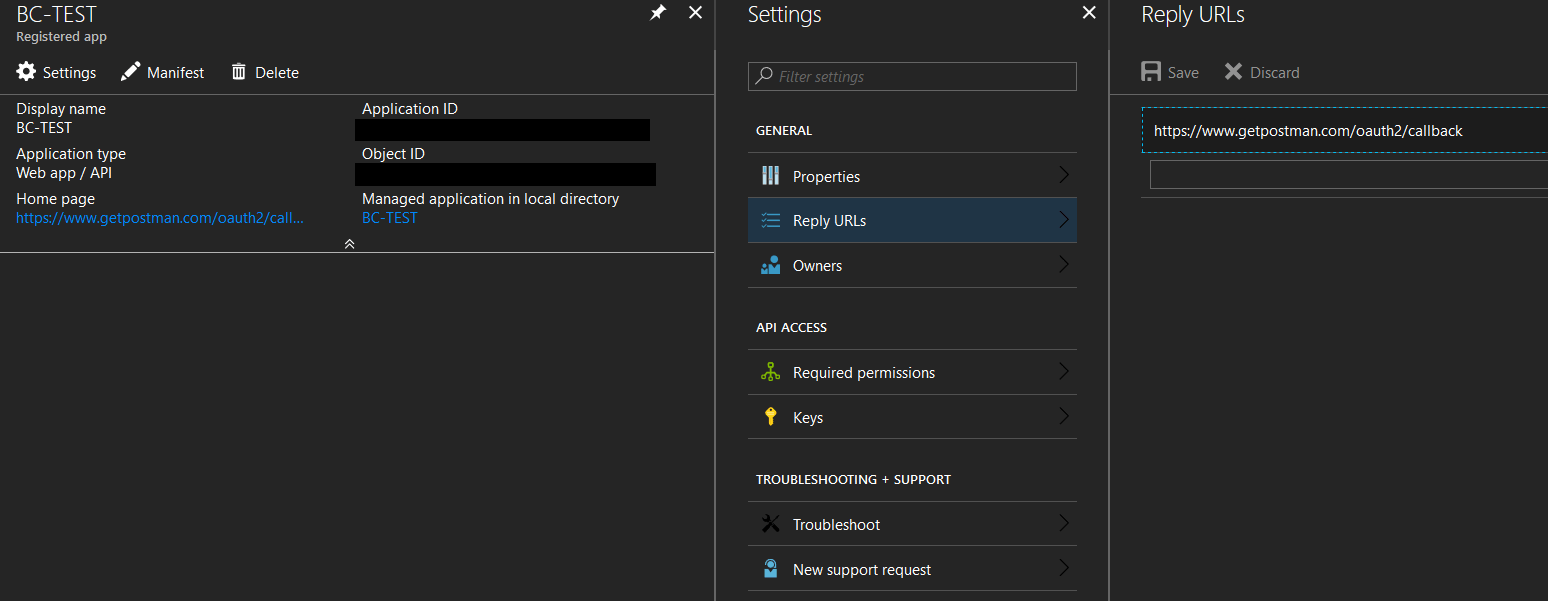
- In Azure Active Directory, create a new Web API Type application registration.
- Sign On URL: https://www.getpostman.com/oauth2/callback
- Reply URL: https://www.getpostman.com/oauth2/callback
- Required Permission: Dynamics 365 (Note: If you are not able to find Dynamics 365 under the required permission, type Dynamics in Search bar on required permission section. Also, remember to Grant Permission to Application(requires Admin permission))
- Under the Keys section, add new Key and Save. Copy the Generated Key as it will not be visible later.
- Now in Postman authorization tab, select OAuth 2.0 in Type. Provide following details
- Give a Token Name
- Call back URL: https://www.getpostman.com/oauth2/callback
- Auth URL: https://login.windows.net/myuserdomain.com/oauth2/authorize?resource=996def3d-b36c-4153-8607-a6fd3c01b89f
- Access Token URL: https://login.windows.net/myuserdomain.com/oauth2/token?resource=996def3d-b36c-4153-8607-a6fd3c01b89f
- Client ID: (Application ID of Azure Application)
- Client Secret Key: Paste the Key copied in step 2.d
- Grant Type: Authorization Code
- Untick Request Token locally
- Click Request Token and then Use Token. If the token is successfully generated, then you will see Authorization Code under Header section in Postman
- Now Click send.