 +1 855 796 4355
CRM Option set in Power BI
Introduction:
In this article, we will learn how to dynamically use Dynamics 365 CRM option set/ CRM picklist in Power BI.
As you may be aware that CRM picklist stores Integer value in the backend and not the actual display name. So, whenever you query an entity with picklist fields in Power BI you will get picklist Integer value and not the display names.
Pre-requisite:
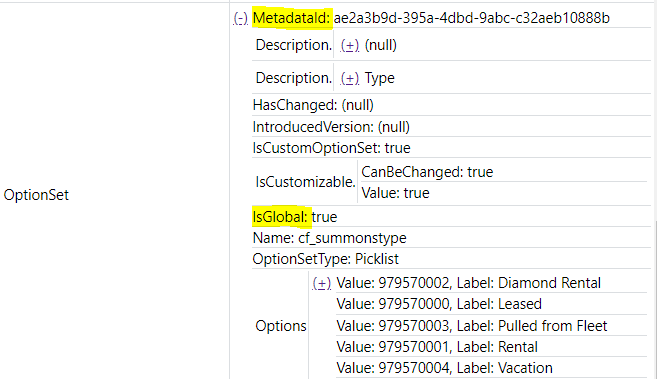
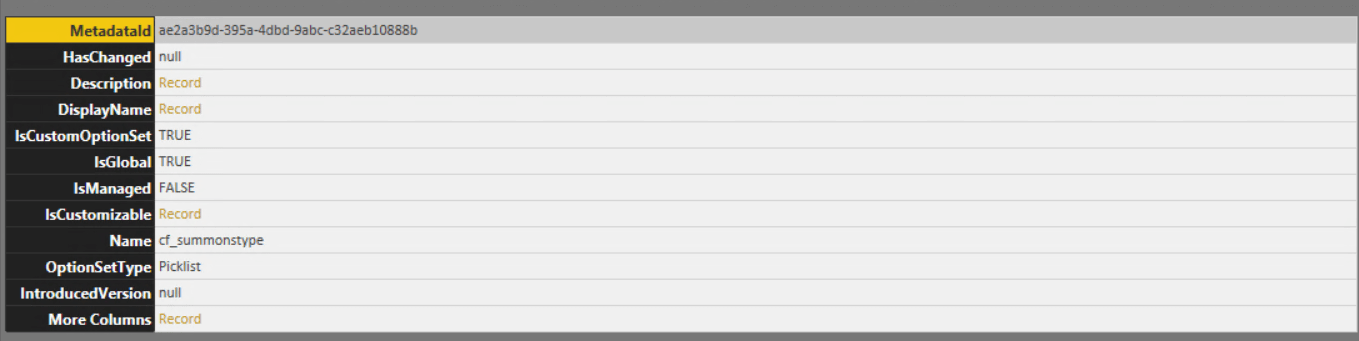
The option set/picklist should be a global. You can check the IsGlobal property for the picklist field in the Metadata Browser.
In Metadata Browser, when you expand Get Options for OptionSet there is a (+) button.

Click on that button and option set properties will appear.
Steps to get Option Set Values:
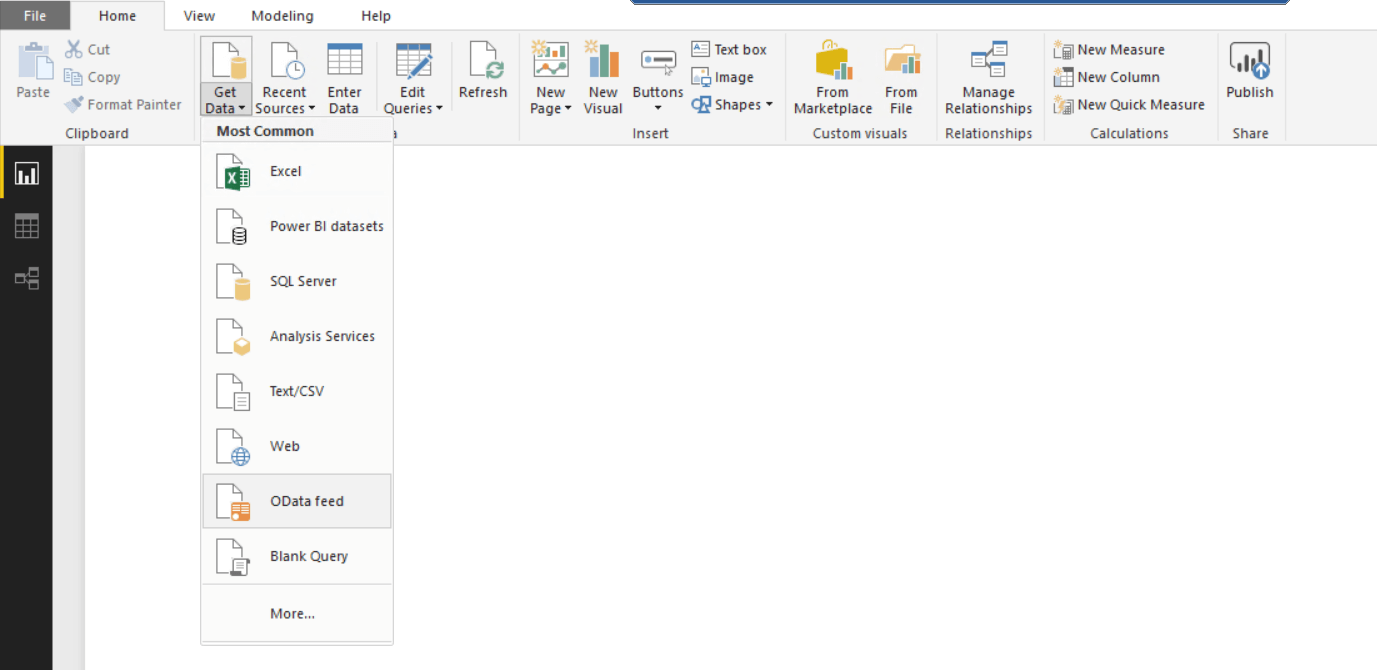
- Login in to Power BI
- Click Get data
- Select Odata Feed as the connector
- Enter the OData URL for querying the Global option sets and click Ok.
URL Format: https://orgname.api.crm.dynamics.com/api/data/v8.2/GlobalOptionSetDefinitions(OptionSetMetadataId)
Example: https://contoso.api.crm.dynamics.com/api/data/v8.2/GlobalOptionSetDefinitions(ae2a3b9d-395a-4dbd-9abc-c32aeb10888b)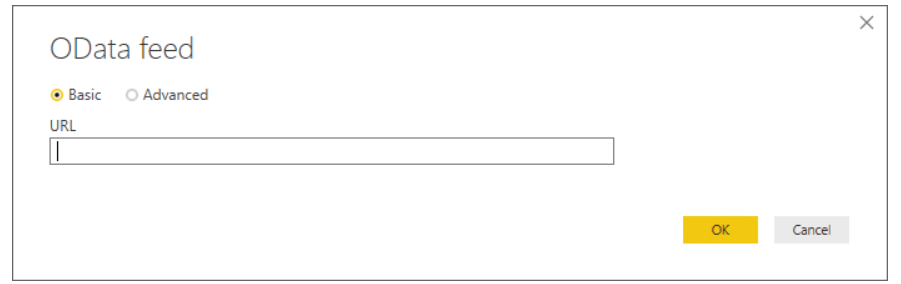 Note: OptionSetMetadataId is highlighted in the Pre-requisite screen capture
 - Once the query is loaded, the Edit Query window will pop up.
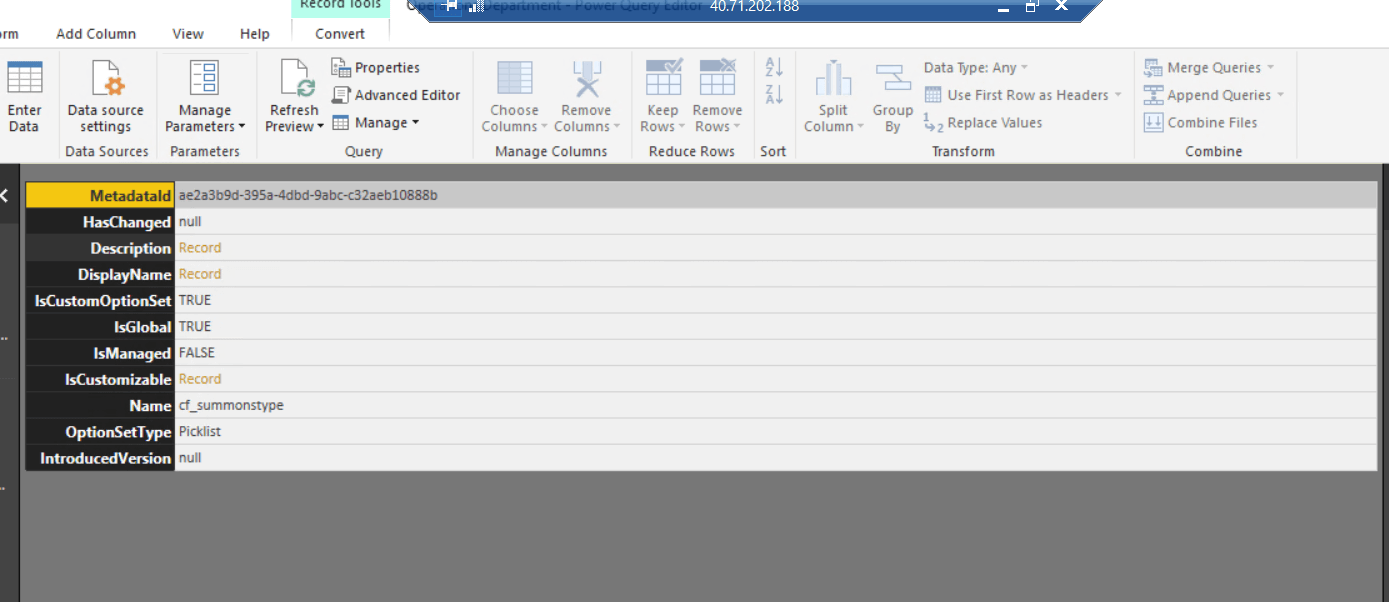
- Click on Advance Editor and modify the code as below (Add null and MoreColumns parameter) and then click Done:
let Source = OData.Feed(“https://fasttrackleasingllc.api.crm.dynamics.com/api/data/v8.2/GlobalOptionSetDefinitions(ae2a3b9d-395a-4dbd-9abc-c32aeb10888b)”, null, [MoreColumns = true])
in Source - After loading, an additional row will be added to the table named More Columns.
- Click on the Record field beside More Columns. A new view of the table will be loaded as shown in the below screenshot.

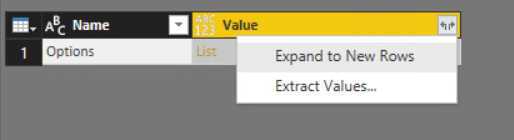
- Right Click on List and Select ‘Into Table’

- Once the table is loaded, expand the Value column by clicking on ‘Expand to New Rows’
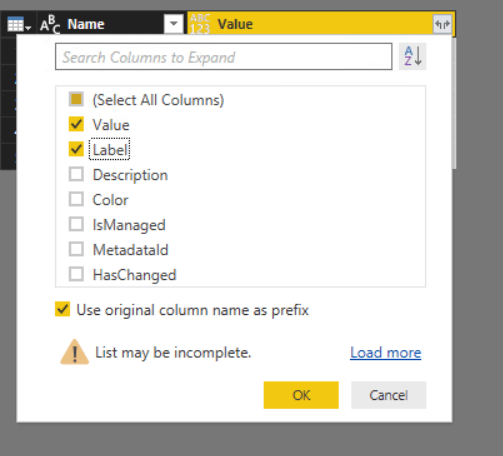
- Expand the Value Column and select ‘Value’ and ‘Label’ Columns. Click Ok.
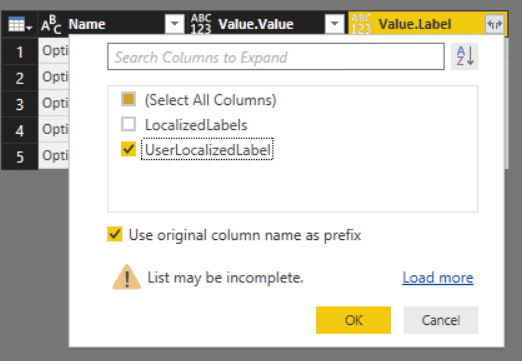
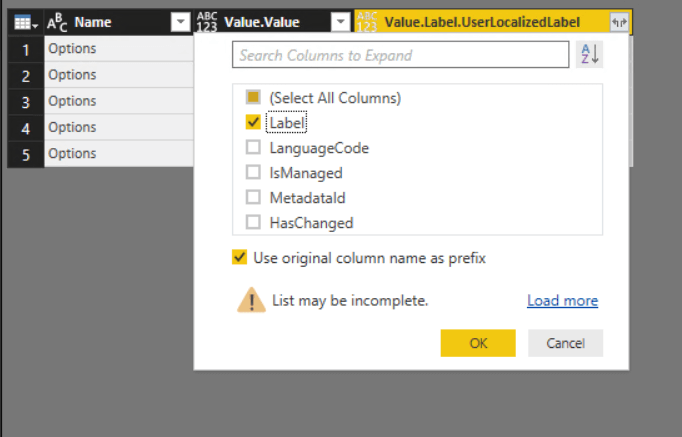
- Expand the Value.Label Column and select ‘UserLocalizedLabel’ Column. Click OK.
- Expand the Value Column and select ‘Value’ and ‘Label’ Columns. Click Ok.
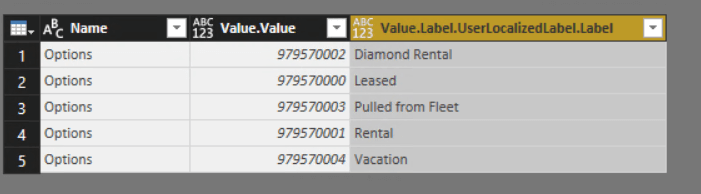
 Finally, we get the Option set Code (Value.Value) and Option Set Value (Value.Label.UserLocalizedLabel.Label) from CRM.
Conclusion:
As the above method creates a separate table for option set, you have to add relationship (1-*) between the newly created Option Set table and the Main table.