+1 855 796 4355
Prerequisites To Copy Data From Dynamics AX to On-Premises SQL Server Using Azure Data Factory
In order to copy data from Dynamics AX to On-Premises SQL Server, we need certain prerequisites –
- Login into https://portal.azure.com/#home
- Create a Data Factory and Click on Author and Monitor.
- Go to Author and create the following-
-
- Connections (Linked Services)
- Datasets
- Pipelines
CONNECTIONS
SOURCE
Click on New Linked service and create a source connection.
Give it a name, Description (optional) and select AutoResolveIntegrationRuntime.
We select AutoResolveIntegrationRuntime as our source is cloud-based (Dynamics AX), If it is on-premises, then only we need to install and select Self-hosted Integration runtime.
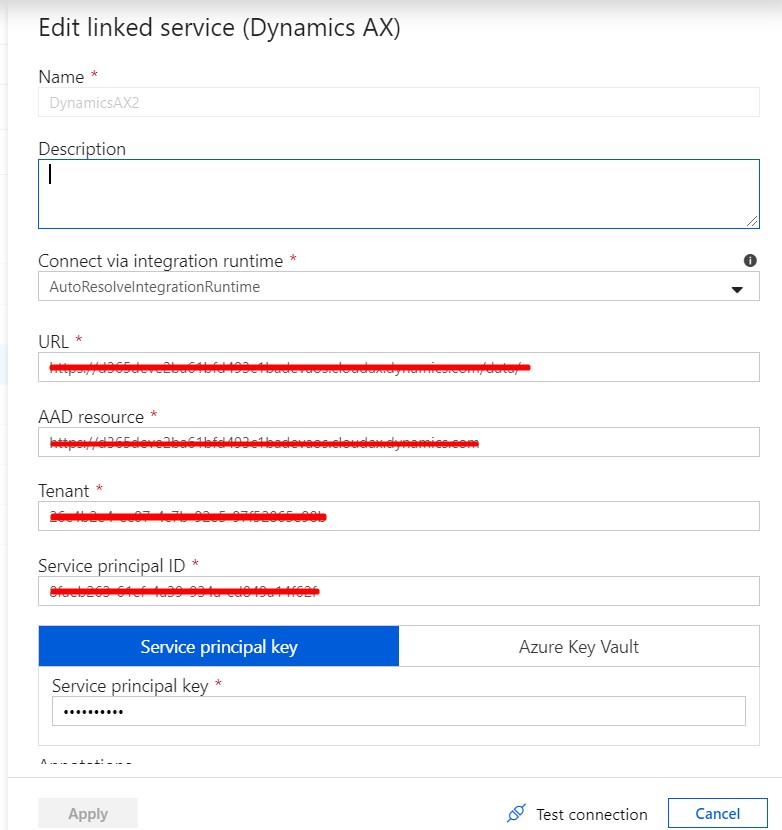
URL: OData Endpoint
AAD resource: Same as URL without /data
Service Principal ID: Application Id from App Registrations.
Service Principal Key: Value from Certificates and Secrets in App registrations.
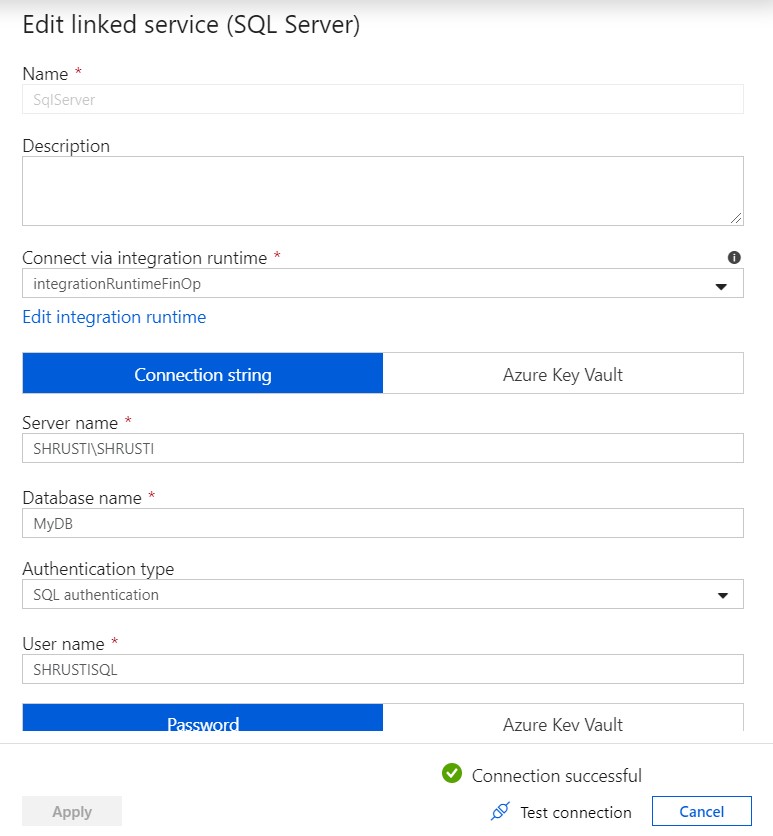
SINK
In our case, Sink is SQL Server so we enter the SSMS credentials to connect to our on-premises SQL Server.
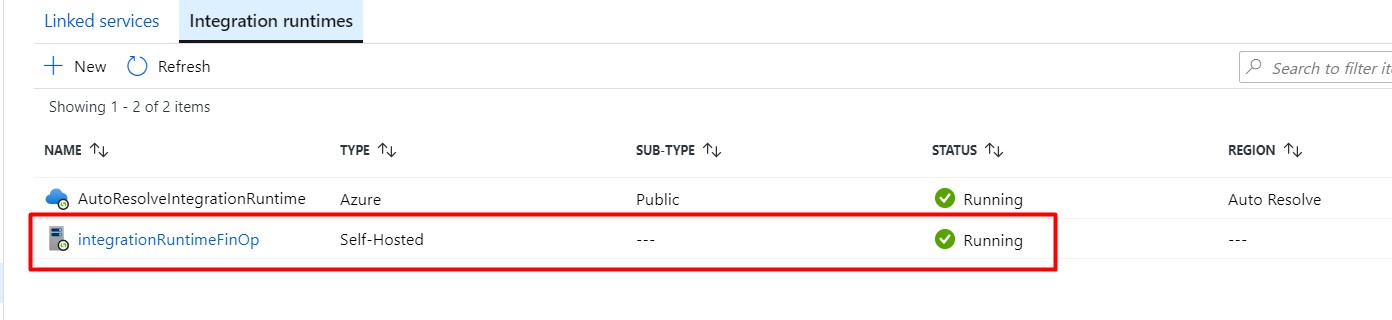
Install the Integration runtime to provide and establish connection of on-premise SQL Server with the cloud.
Test the connection.
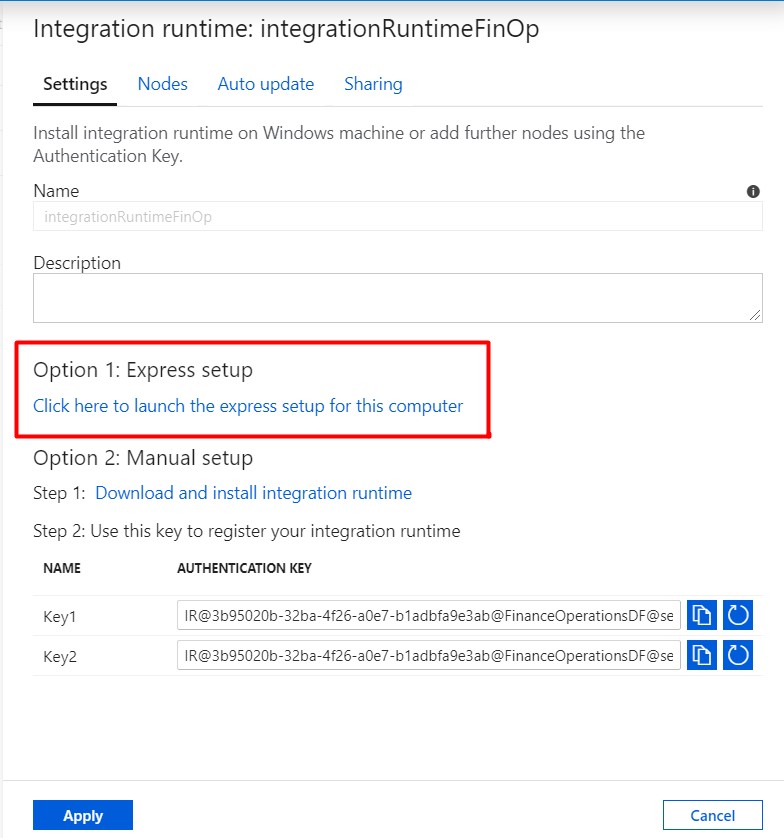
INTERGRATION RUNTIME
We can choose between Express-setup and Manual Setup to install the integration runtime.
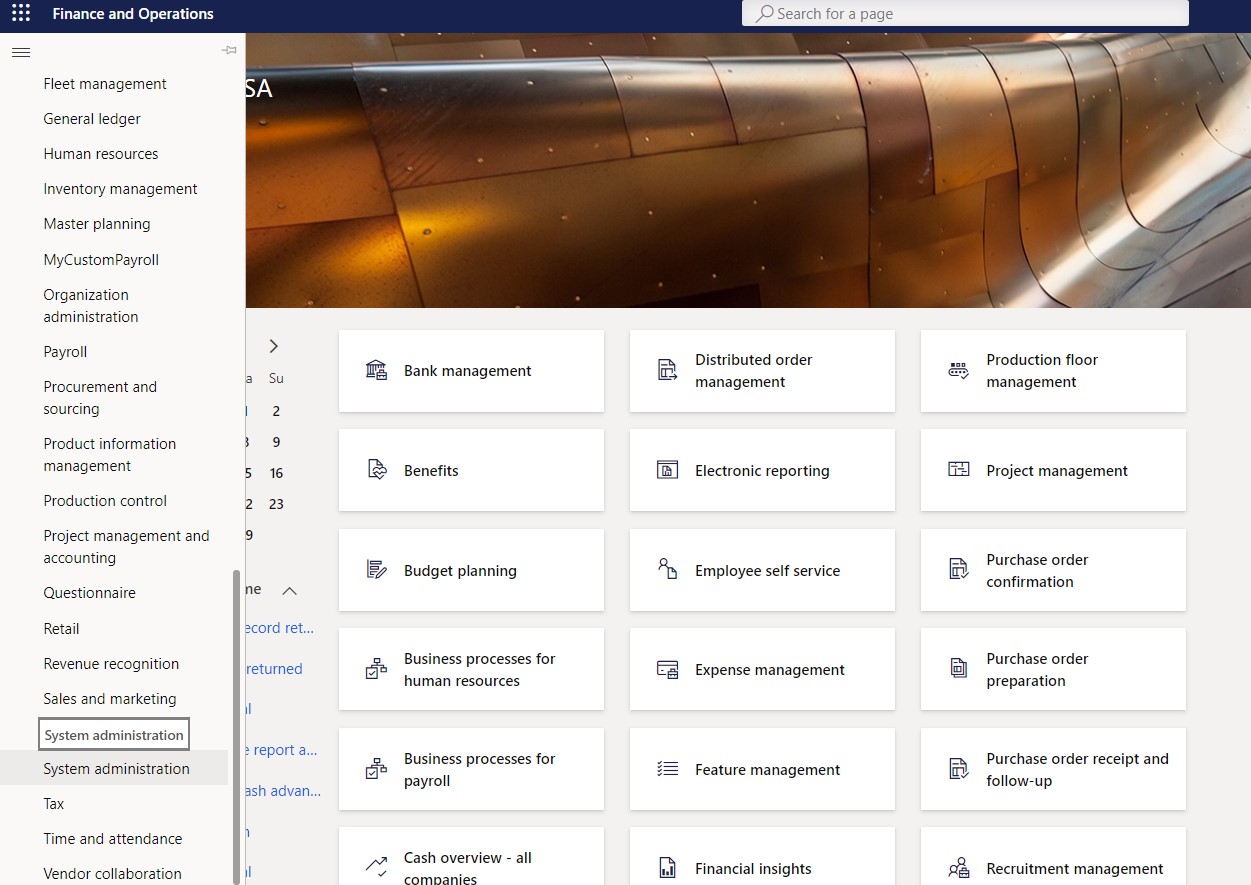
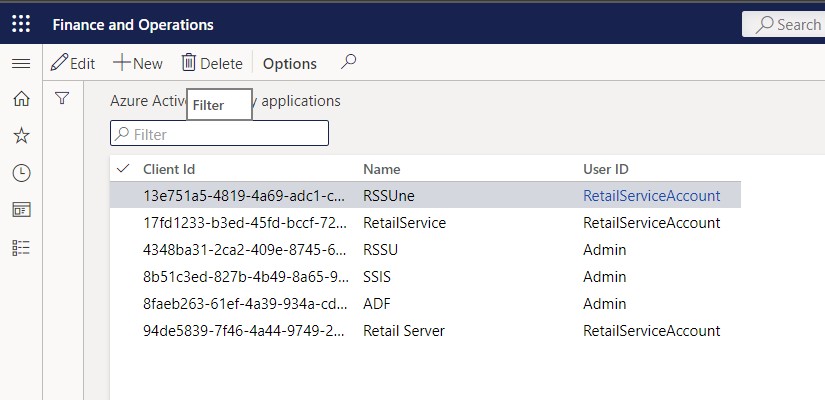
Then go to Dynamics AX, and grant this service principal proper permission to access your Dynamics AX.
In order to grant permission, go to Dynamics AX -> System Administration and add your Client ID there.
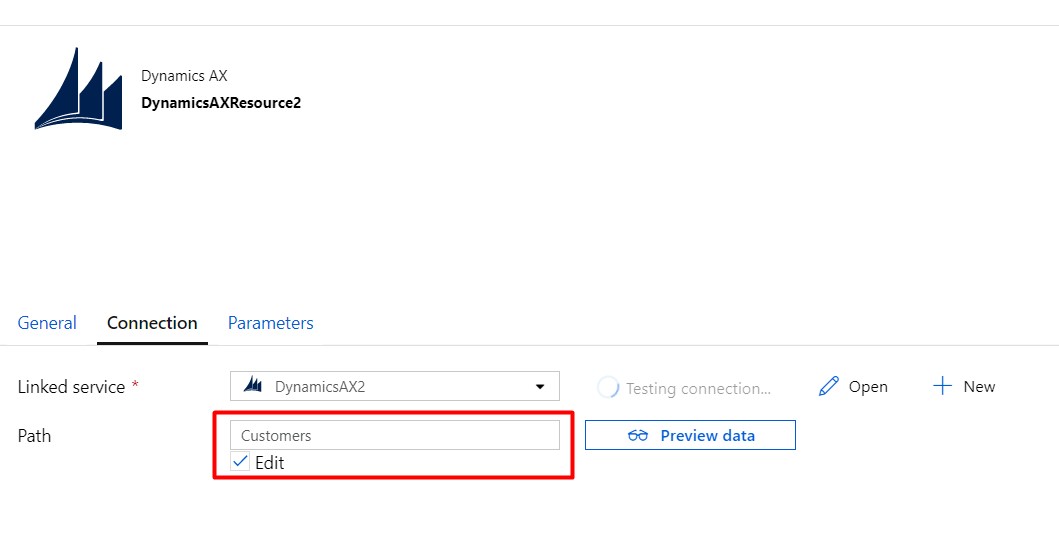
DATASETS
Create Dataset for Source and Sink.
For the source dataset, select the source connection from the drop down for Linked Service field.
In the path field, Select the desired entity.
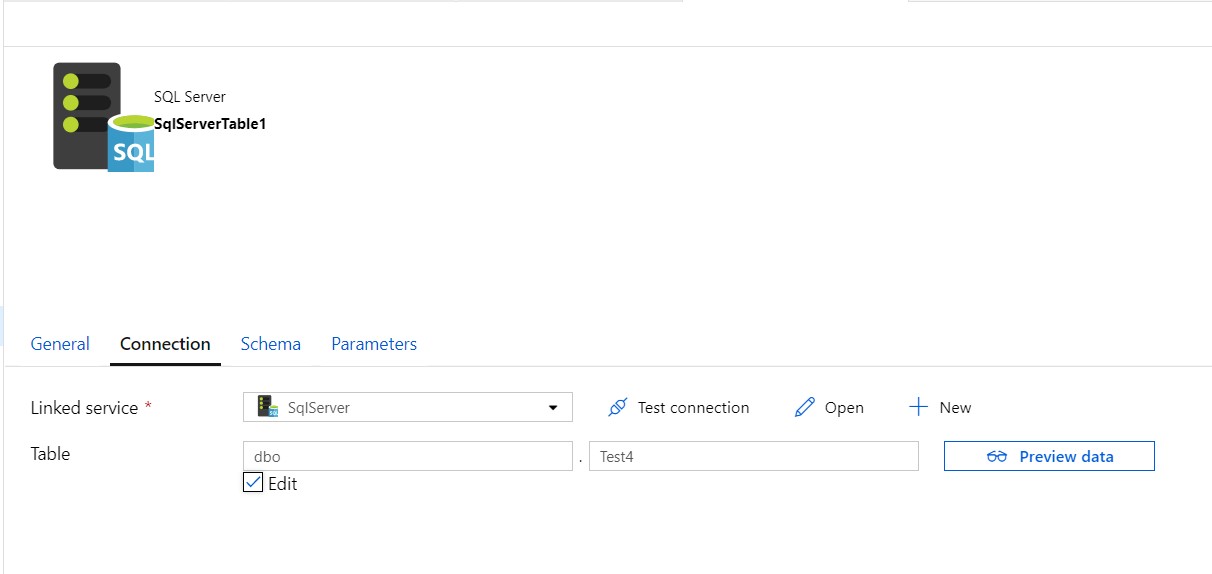
For the sink dataset,
In the table field, you can either select a specific table to copy your data or check the auto-create option to make a new table in the sink.
Check the Edit option in the Table field and give the desired name of the table to auto create it.