+1 855 796 4355
Integrating SharePoint with D365 Portal
Introduction:
This blog explains how we can add files from D365 Portal directly into SharePoint which was long awaited feature missing from Portals.
Below are the Steps:
Step 1: Set up SharePoint integration from Portal Admin Center
1. Go to the Dynamics 365 Administration Center page and select the Applications tab.
2. Select the name of the portal for which you want enable SharePoint integration, and then select Manage.
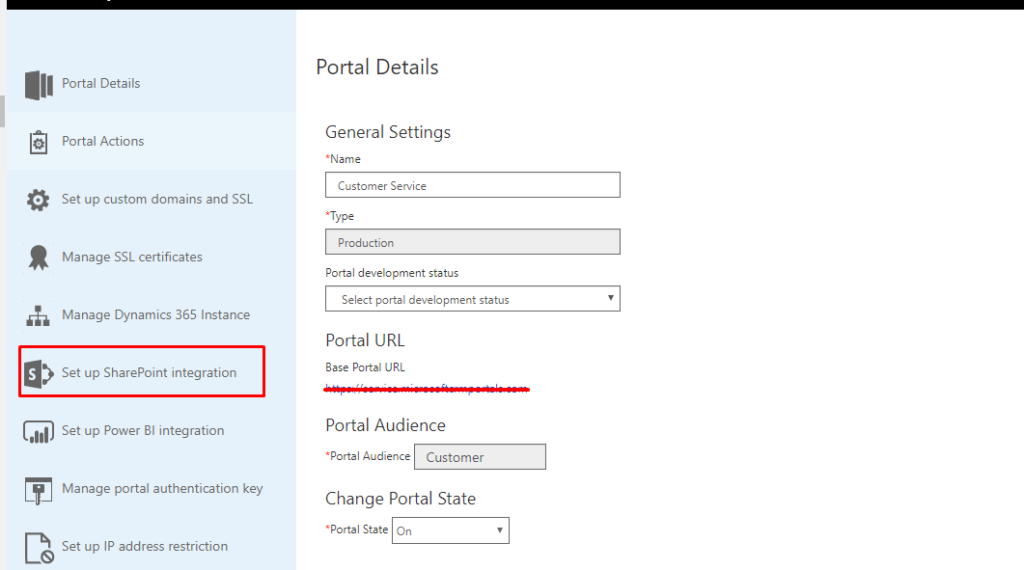
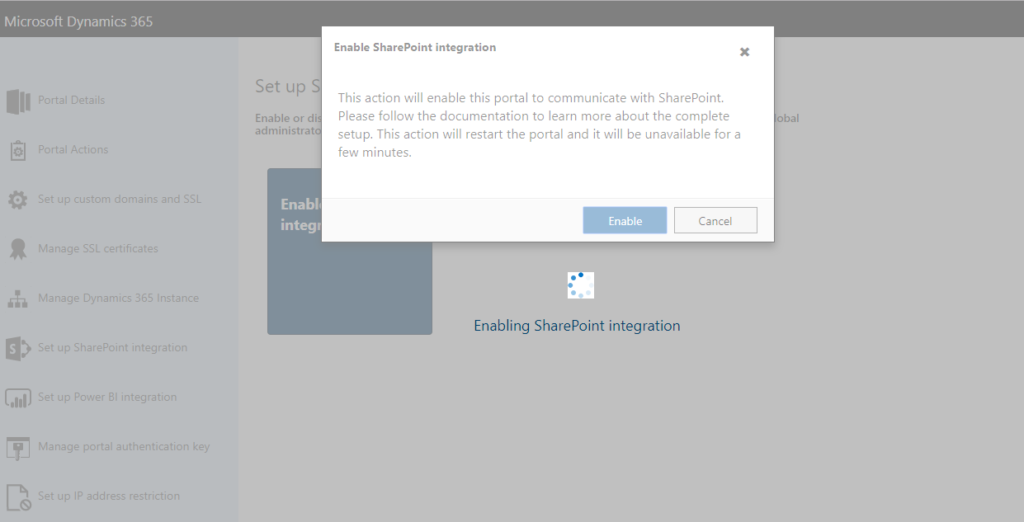
3. Click on Set up SharePoint integration –> Enable SharePoint integration.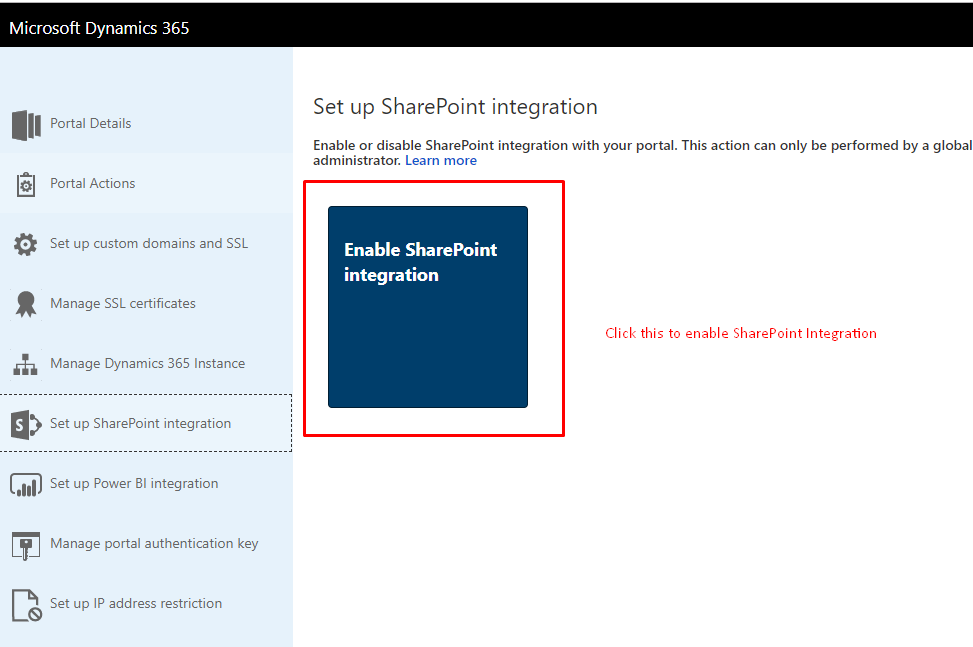
4. Click on Enable button it will then ask you to sign in again.
5. Enter D365 CE (MS CRM) credentials to sign in again.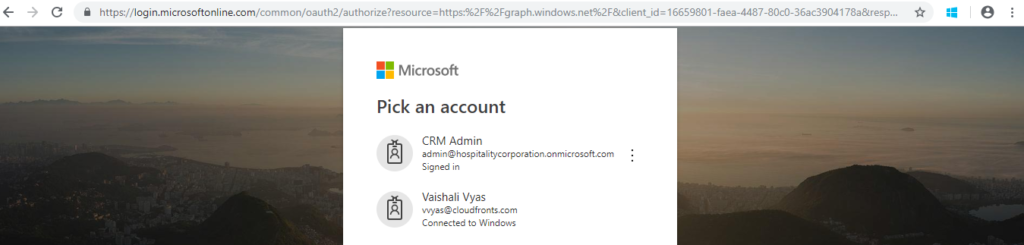
6. Click on Accept to grant the required permissions.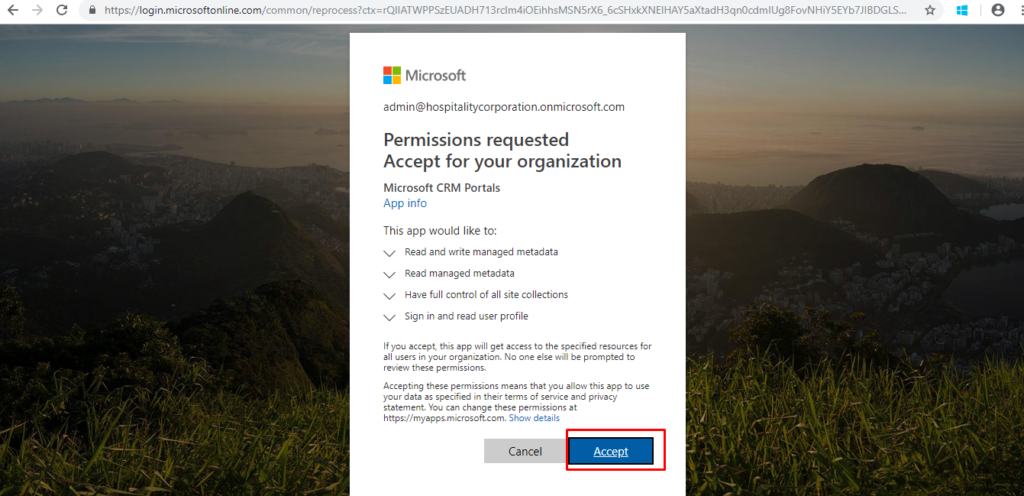
7. You will get the below message.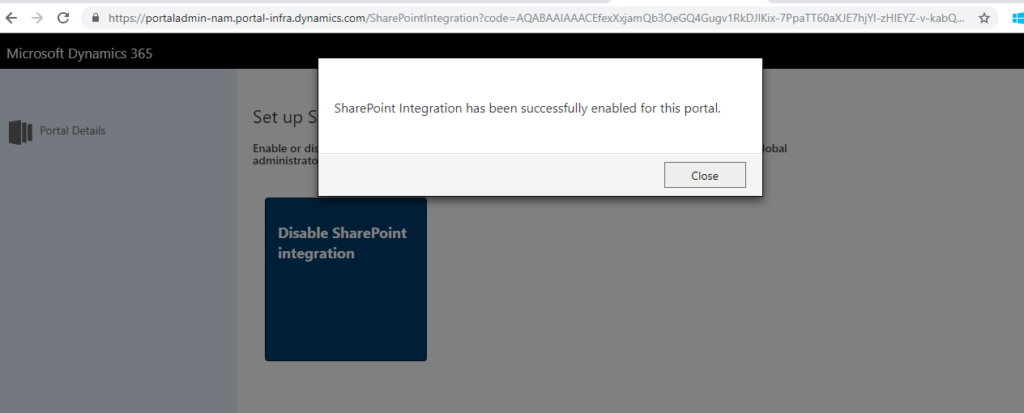
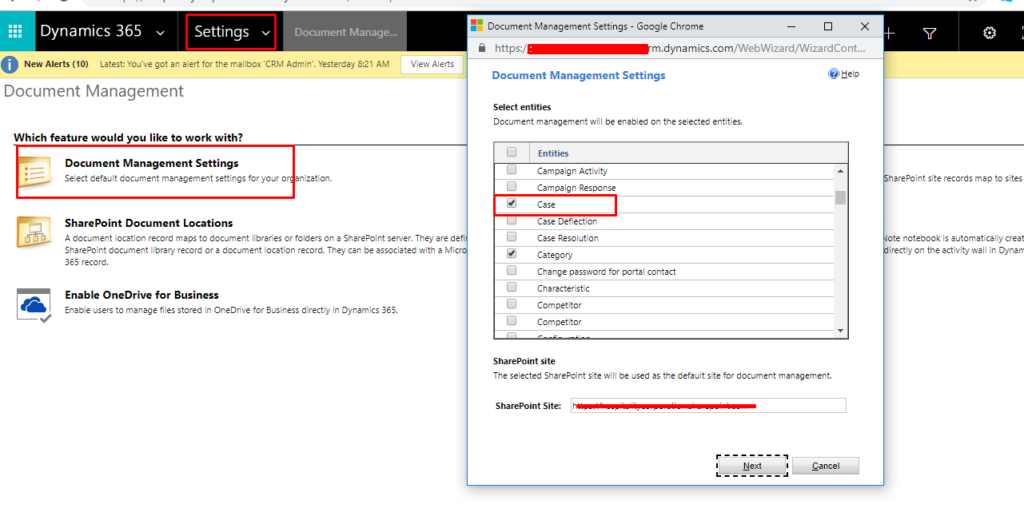
Step 2: Enable document management for entities (Customization in D365 CE)
NOTE: If document management is not enabled already then follow below steps.
- Go to Settings –> Document Management –> Document Management Settings
- Select entity
- Click on Next and Finish.
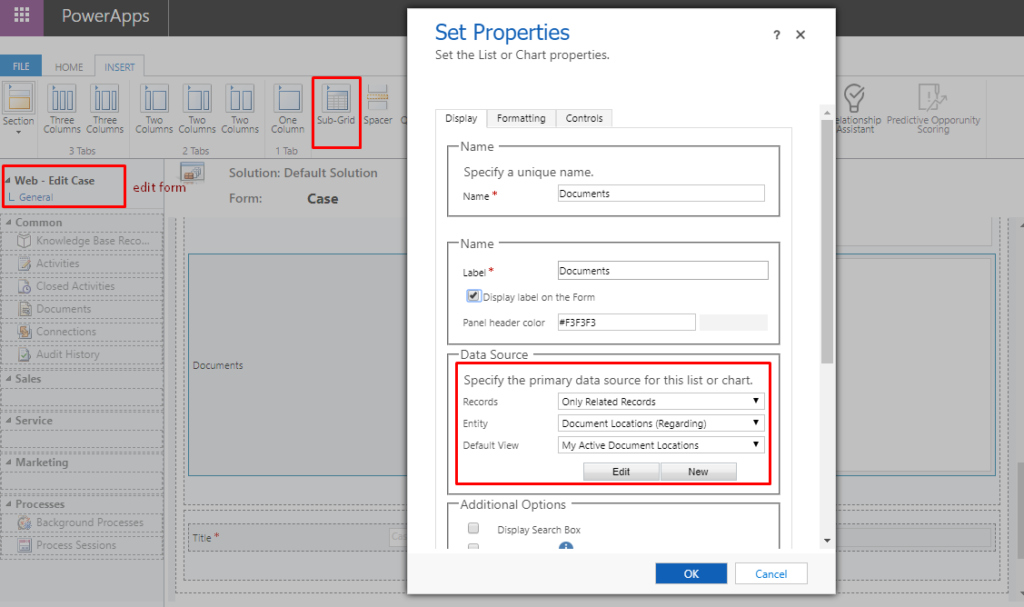
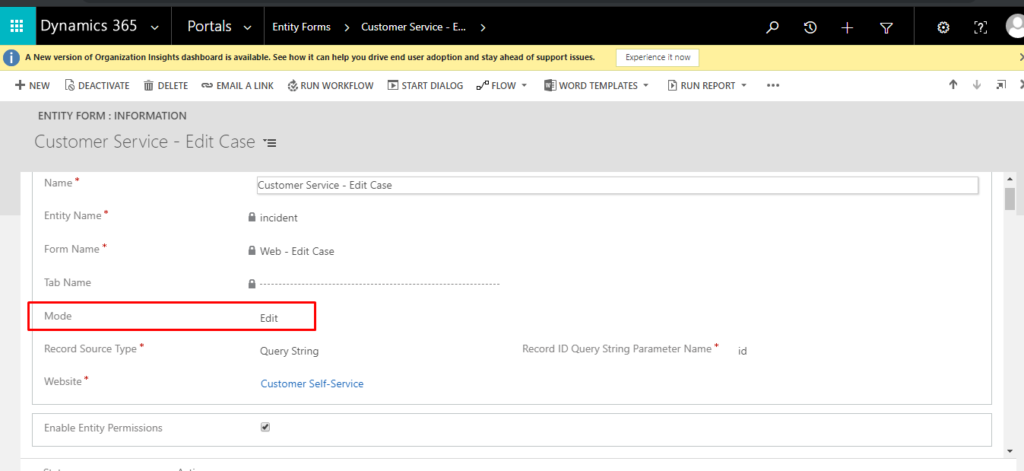
Step 3: Configure the appropriate form to display documents
- We need to add Document Location subgrid in the form which will get displayed in portal.
(NOTE: Add subgrid on Edit form to edit the record in portal only.)
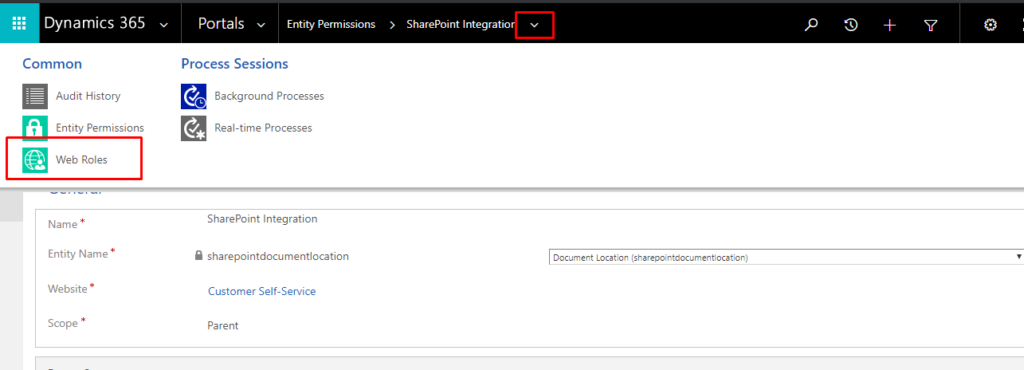
Step 4: Creating and Assigning Entity Permissions.
1. Create entity Permission of Scope “Global” for Case (Incident) Entity.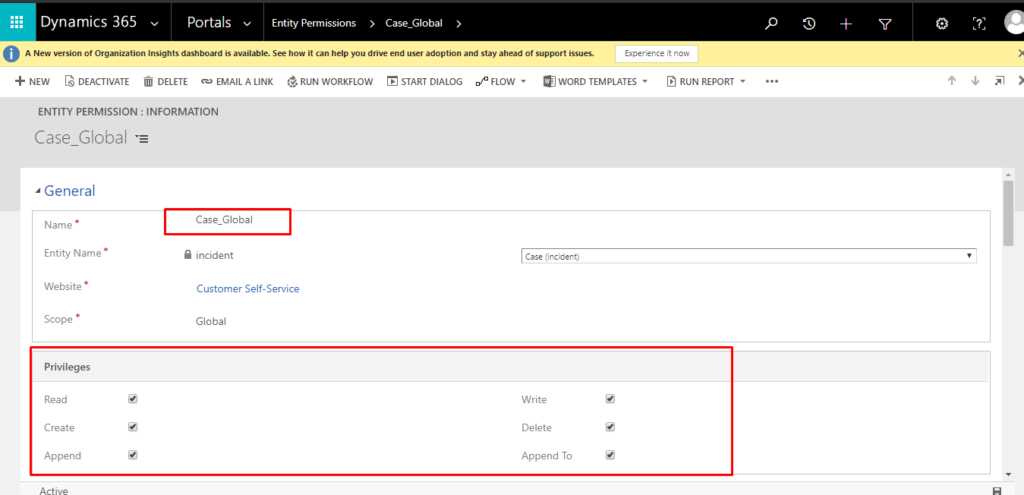
2. Click on “+” to Add Child Entity Permission for “Document Location”.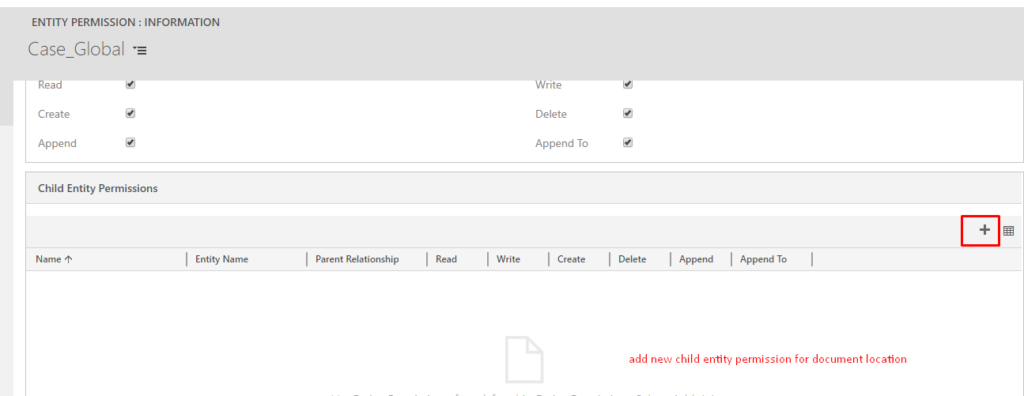
3. Click on “New”.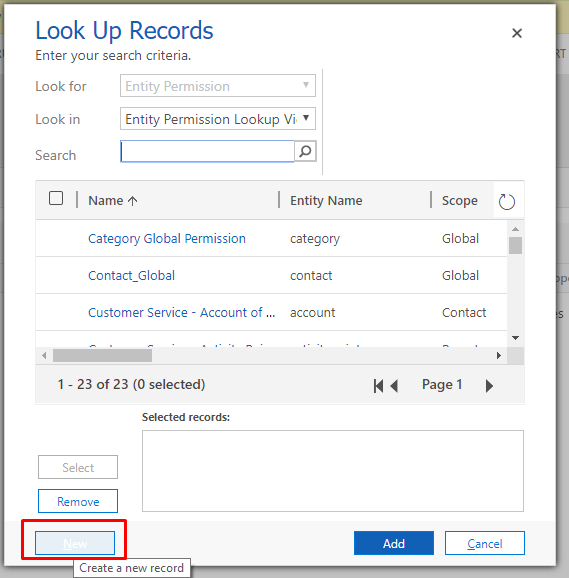
4. Enter below details.
Entity Name: Document Location
Scope: Parent
Parent Entity Permission: Case_Global(Select the name of parent entity from lookup)
Parent Relationship: Select the name from drop down.
Select all the Privileges.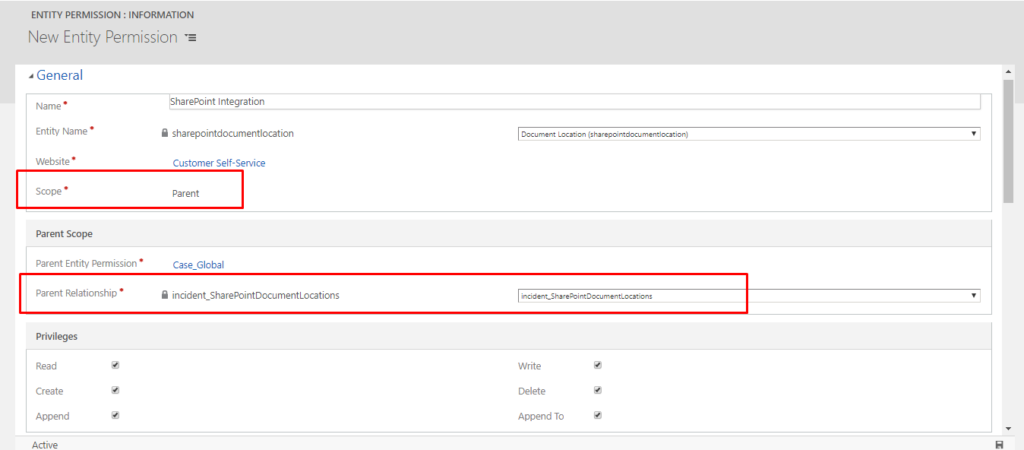
5. Save the record.
6. Your Global Entity Permission should look like below.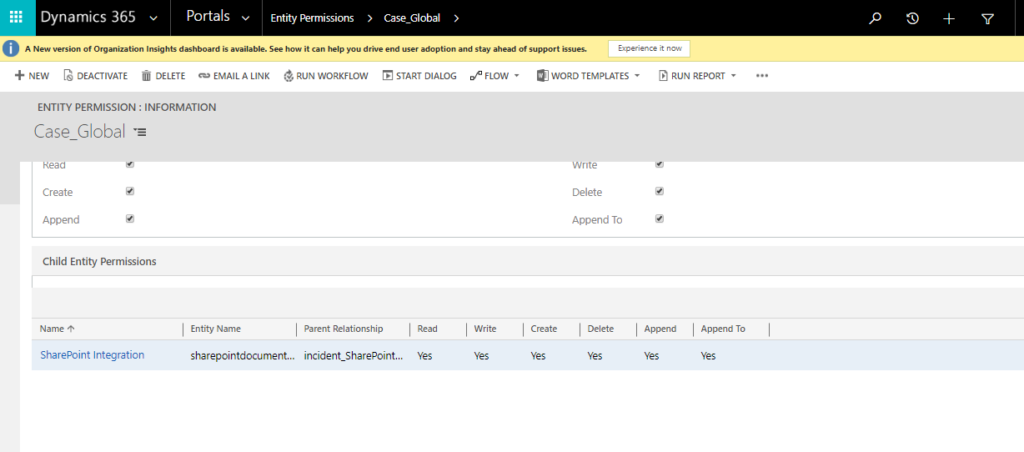
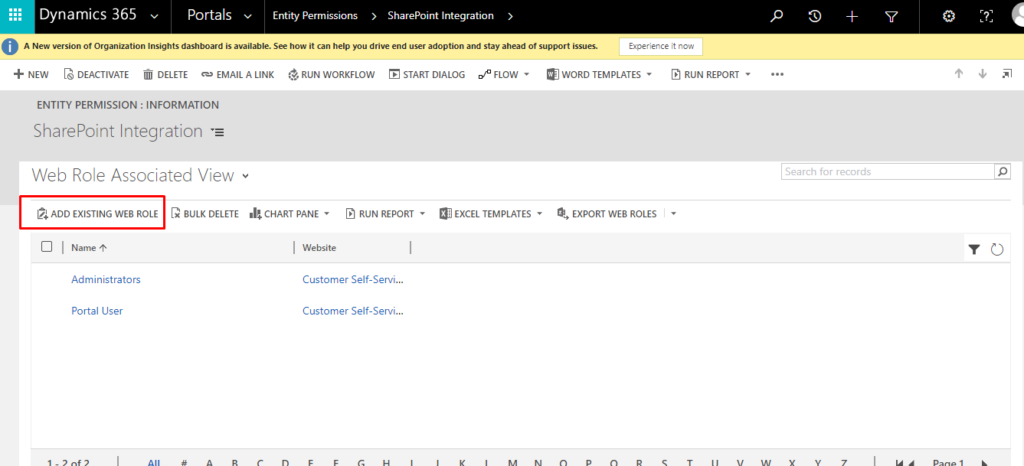
7. After Creating Entity Permission successfully assign web role to the entity permissions.
Sign in to Portal
1. Open any Case record.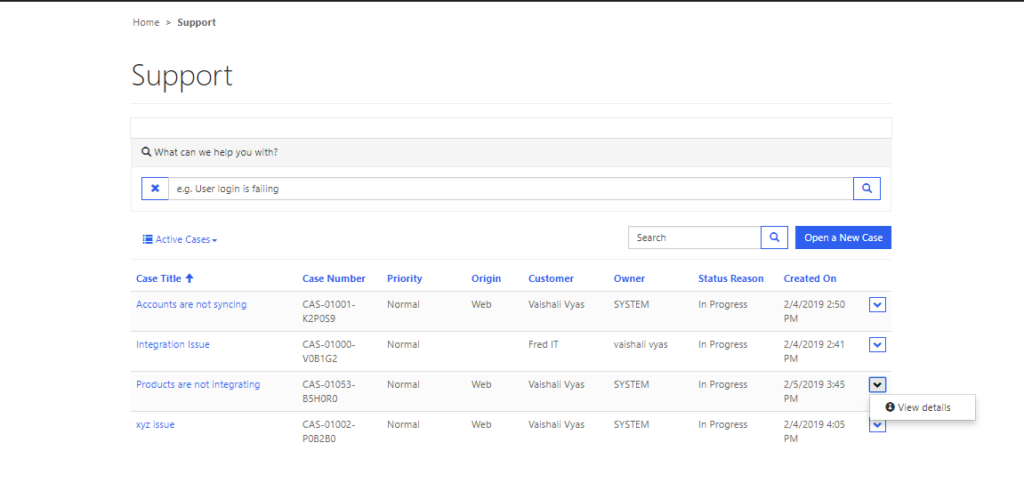
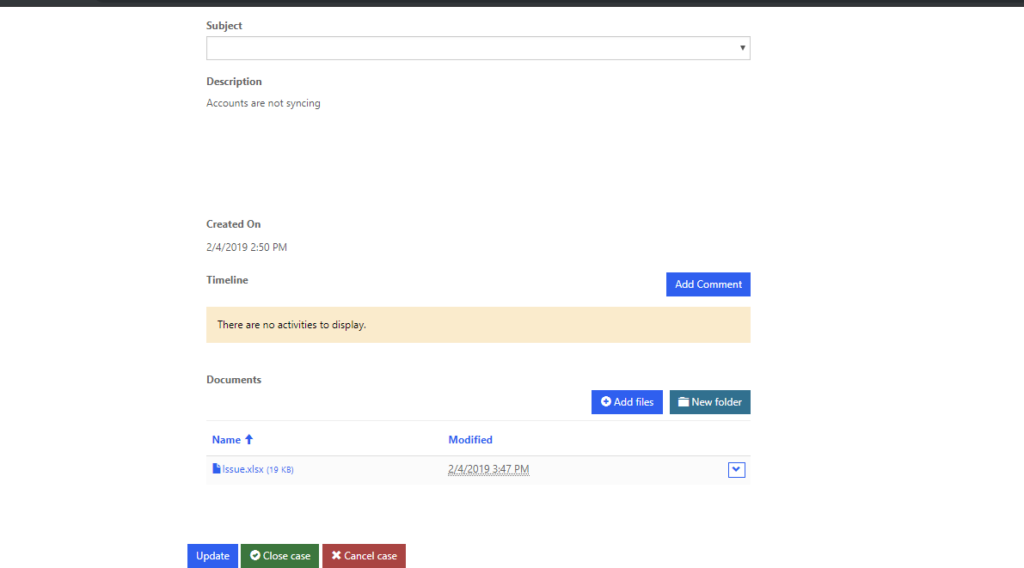
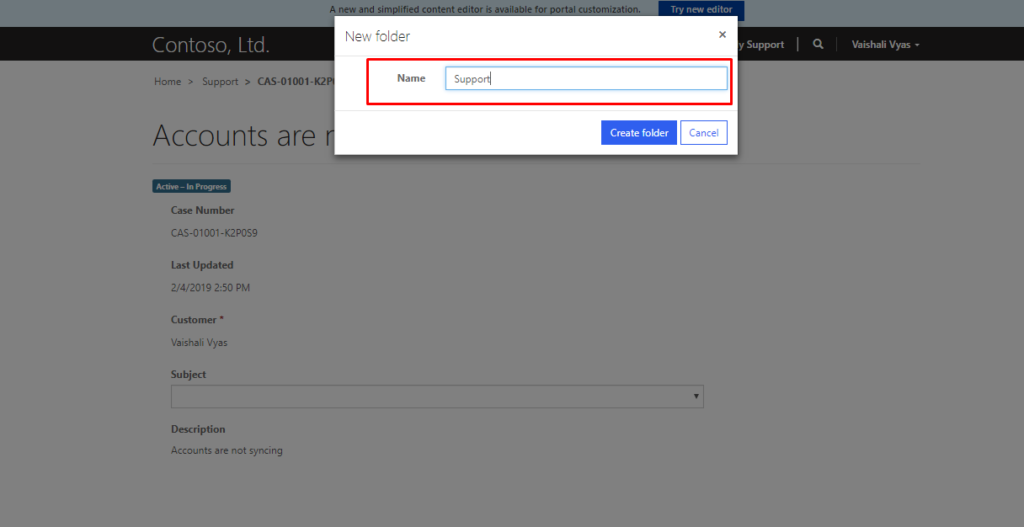
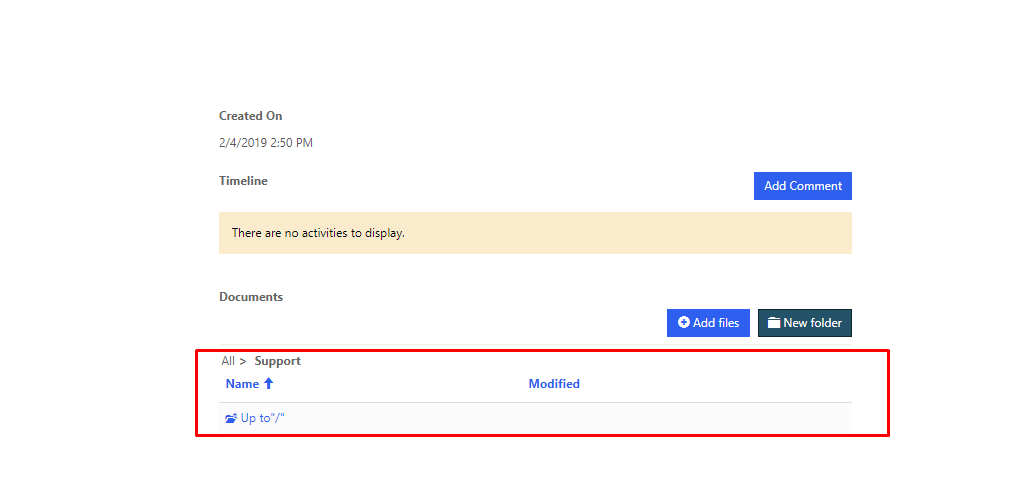
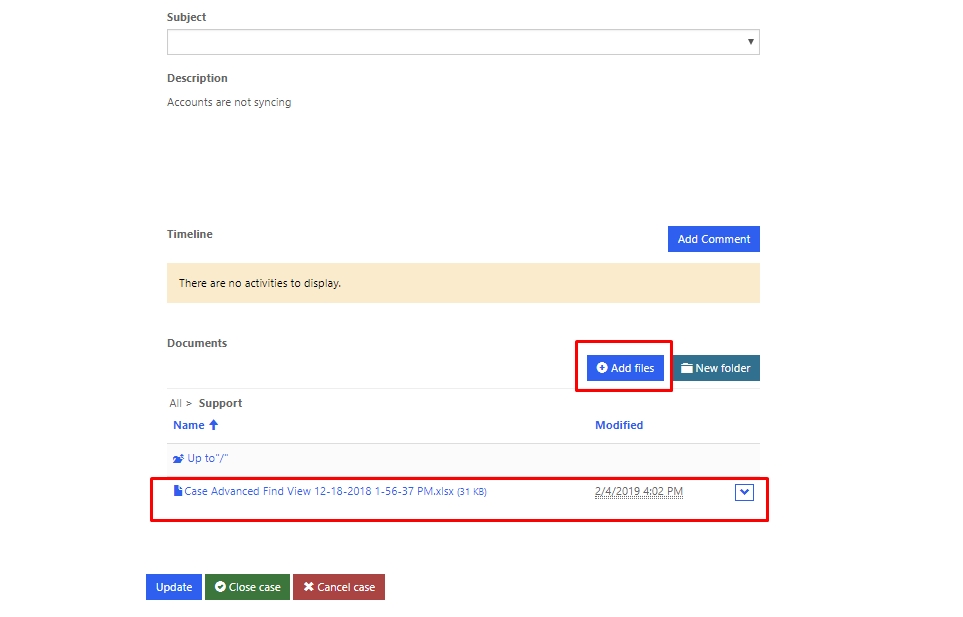
2. You can see Document Section below from where you can “Add files” or Create “New folder”
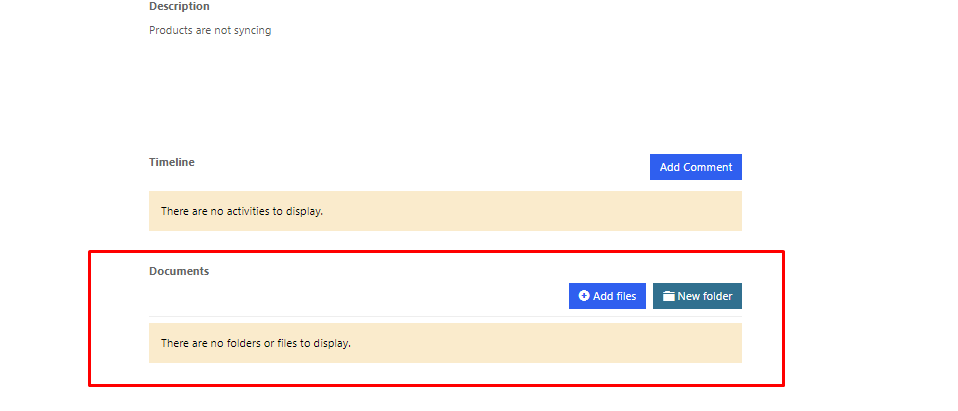
3. Click on “Add files” button you are shown a pop-up window from where you can choose the files to upload.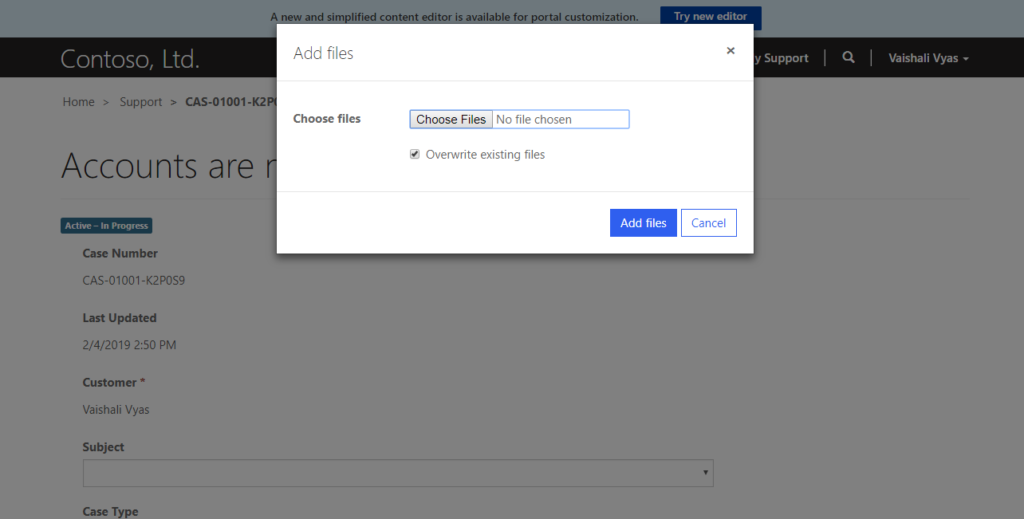
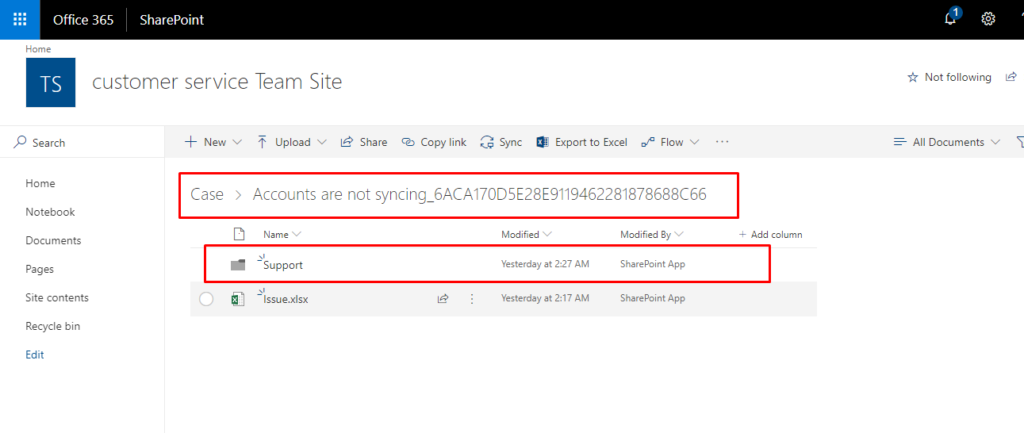
4. You can see the New Folder is created in SharePoint for that Particular Case and file is also uploaded inside respective folder.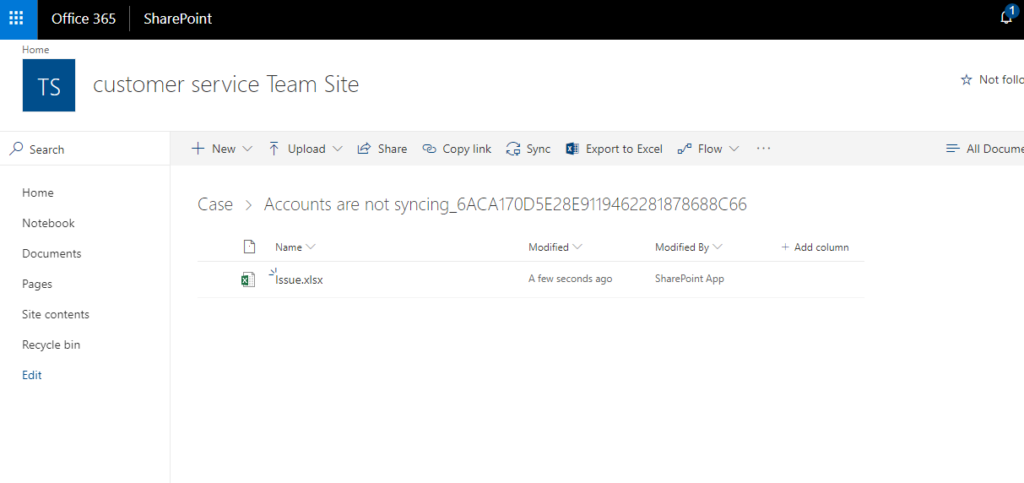
5. Click on “New Folder” to create new folder this will get created inside the parent folder “Case_CaseGUID” in SharePoint.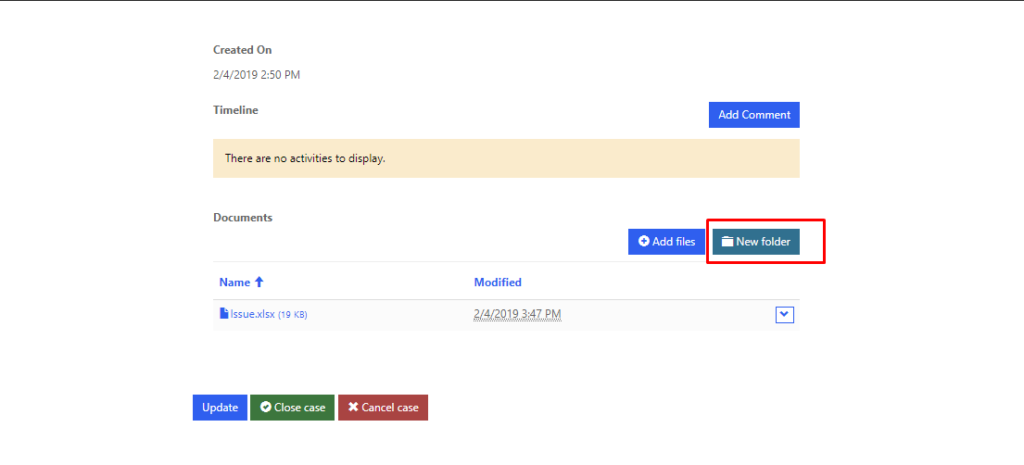
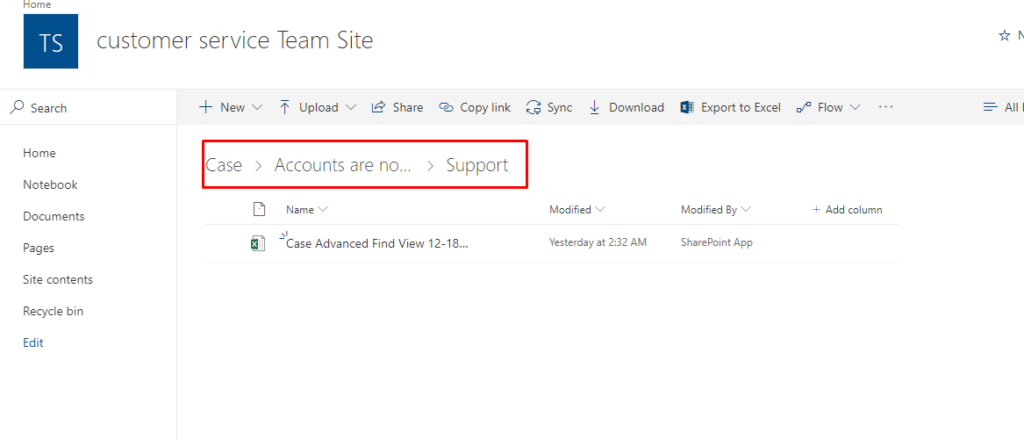
6. From portal you can go inside the folder and then upload files which gets uploaded inside the respective folder in SharePoint.
“Add Files” in newly created folder.
New Folder and Files in SharePoint.