+1 855 796 4355
Adding “Change Password” in Profile Navigation of D365 Portal.
Introduction
This blog explains how we can add “Change Password” in the Profile navigation of the D365 Portal.
Steps to be followed:
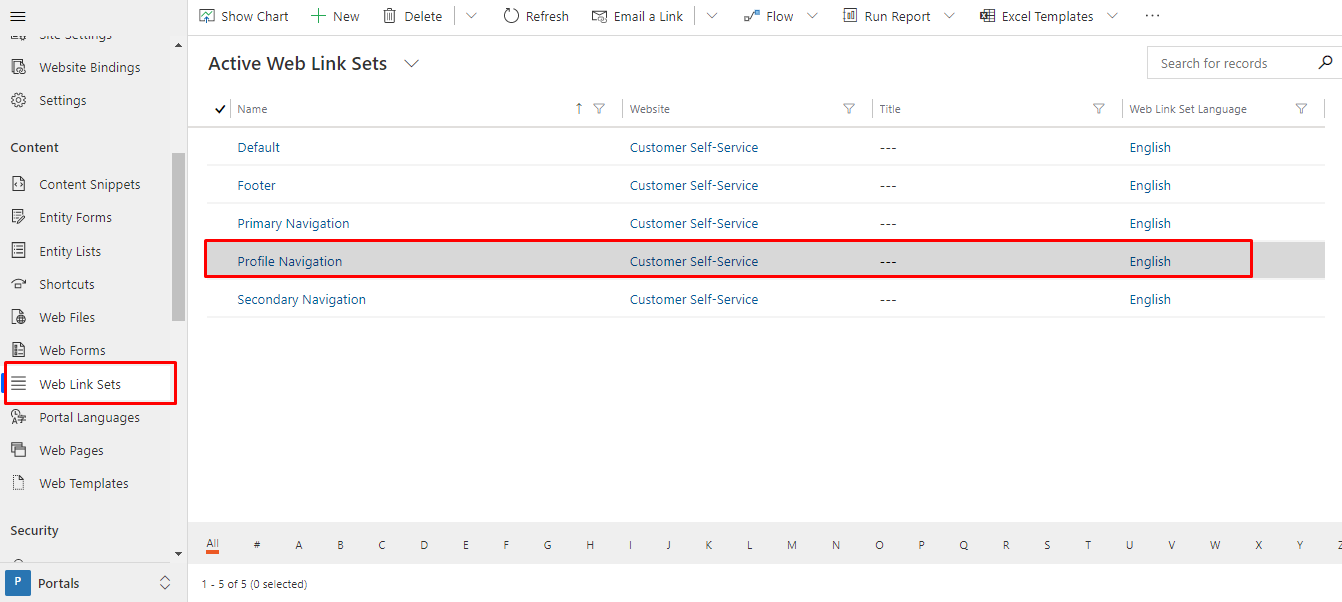
- Go to Weblink sets ? Profile Navigation
- Open Profile Navigation record
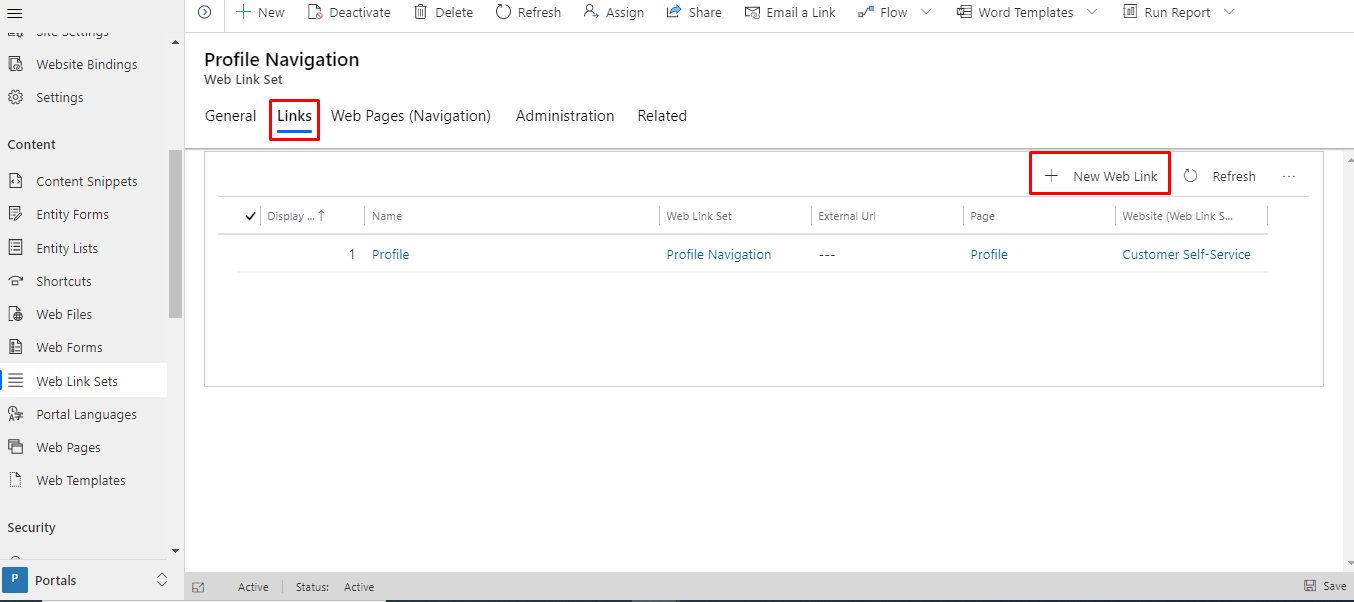
3. Click on the “Links” tab.
Add “+ New Web Link”
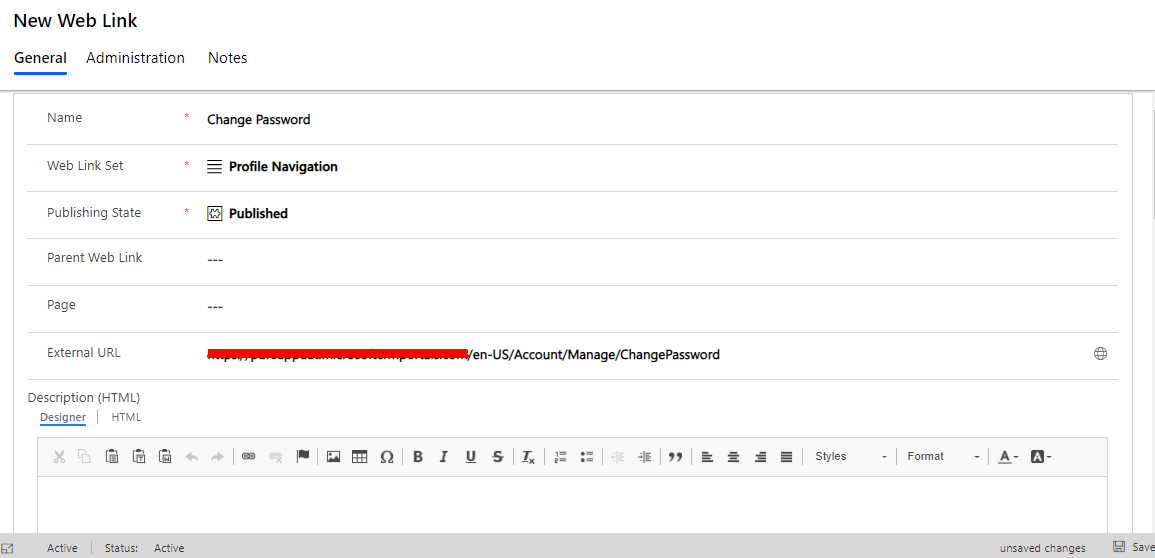
4. Add below details in the form
Name: Change Password

Web Link Set: Profile Navigation

Publishing State: Published

External URL:

<portal url>/en-US/Account/Manage/ChangePassword

Display Order: 2
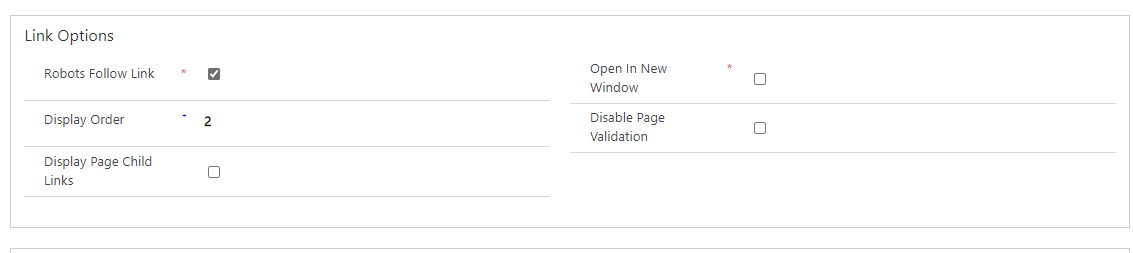
5. Save the record.
6. Now you can see the “Change Password” option in the profile navigation of the portal.
NOTE: if you don’t see the changes clear the cache of the portal and check again.
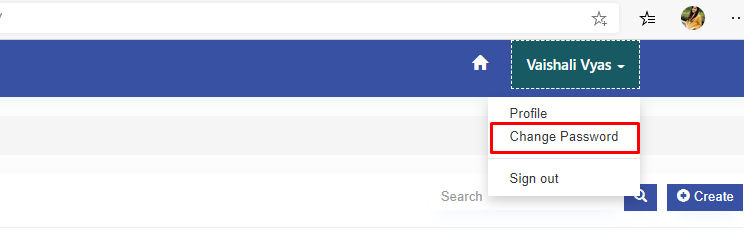
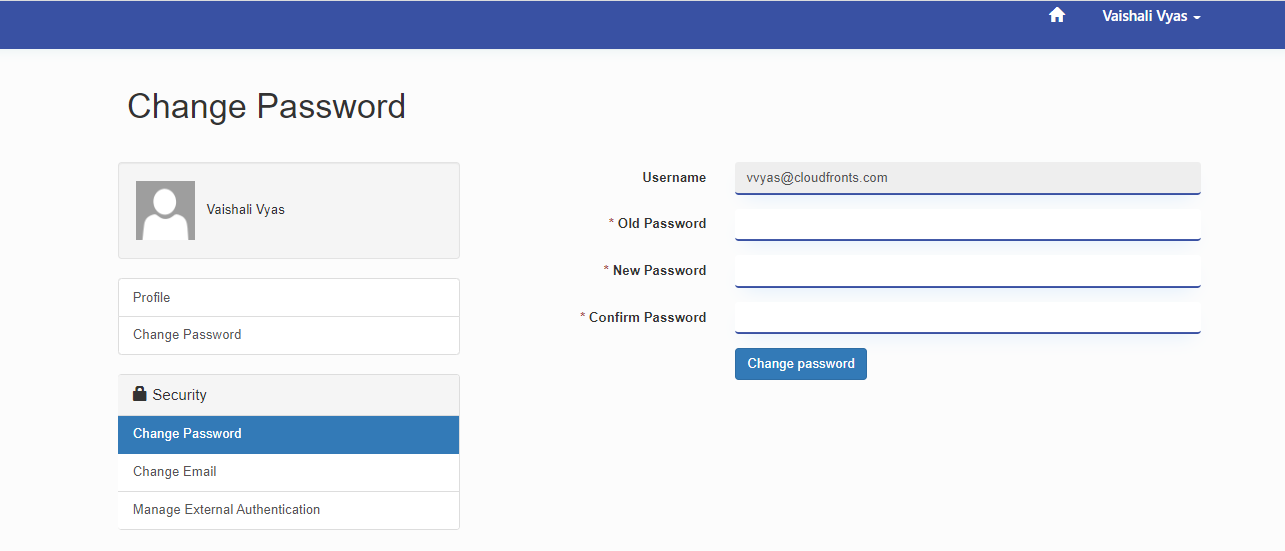
– Click on “Change Password” and it will navigate you to the page below.
– You can change your password from here.